
The Dolomites are a photographer’s dream, where dramatic peaks, golden sunrise light, and charming mountain huts create unforgettable scenes at every turn. Whether you’re chasing early‑morning light over jagged ridges, capturing cozy refuge (mountain lodge) views, or snapping cable cars against alpine backdrops, this guide has you covered. Our 22 Dolomites Photo Guide highlights the best spots to capture breathtaking images and plan your itinerary. Get your camera ready — the magic of the Dolomites awaits with stunning views and picture‑perfect moments
Use these 22 stops like a weekend photo map: start with sunrise viewpoints, ride a cable car for high ridges, then end at a rifugio terrace for wide panoramas. Lift schedules and mountain weather change quickly, so confirm opening hours on the official lift sites before you go.
1) Seceda Ridgeline Sunrise (Val Gardena)
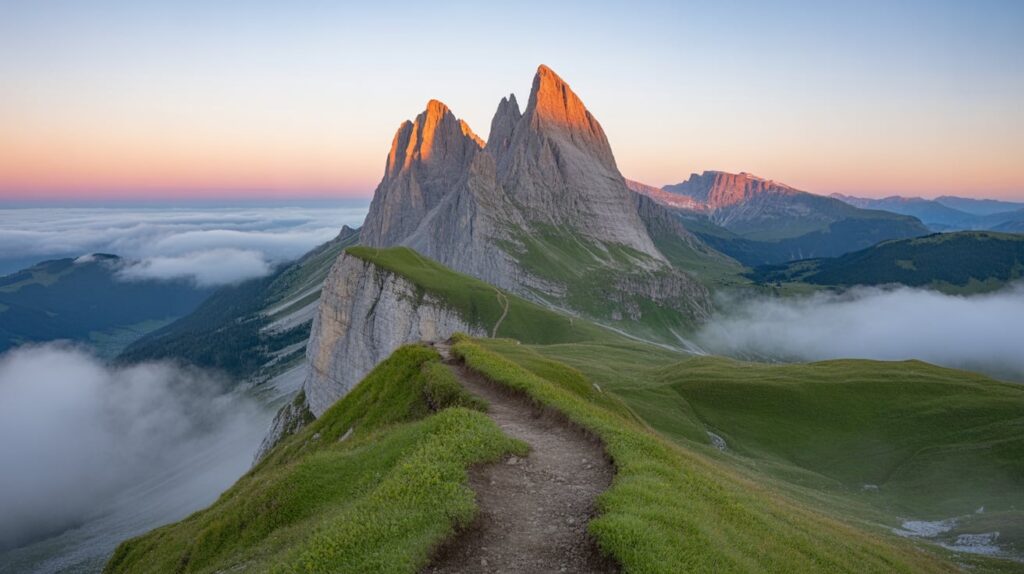
Seceda is the classic Dolomites ridge, and sunrise reveals the Odle spires with clean contrast. Start early in Ortisei and ride up while the valley stays dark and quiet. At the top, walk toward the ridgeline where the trail curves across bright grass. Frame a wide shot with sky color above and shadowed valleys below. Then shoot tighter layers of peaks to emphasize depth. Stay through the first light to catch warm highlights on the rock.
For a strong composition, place the trail as a leading line and keep people small for scale. Wind can be sharp on the ridge, so stabilize your camera and keep lenses protected. The Ortisei–Furnes and Furnes–Seceda cable cars are the fastest way to reach the viewpoint area. If clouds roll in, switch to moody ridge silhouettes and expose for the sky.
2) Alpe di Siusi Sunrise Meadows (Seiser Alm)
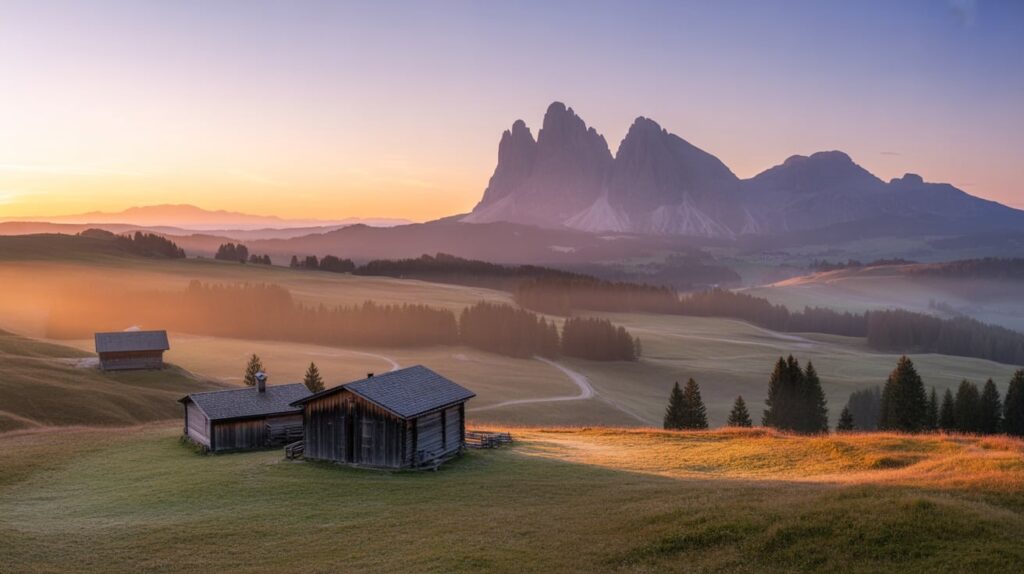
Alpe di Siusi is built for sunrise because the meadows hold fog and soft color. Arrive while stars are still visible, and walk into the open fields before the light spreads. Look for huts or fence lines to anchor your foreground. Keep the mountains as your horizon and leave space for the sky gradient. Photograph the moment when the first sun hits grass and turns it gold. Finish with a second frame focused only on light patterns in the slopes.
To reach the plateau efficiently, use the Alpe di Siusi cable car up to Compaccio when it is operating. The wide-open landscape rewards clean, simple framing with minimal clutter. If you see mist, lower your angle to stack layers of field, haze, and peaks. A moderate telephoto works well for compressing rolling hills and huts.
3) Passo Giau Sunrise with Mountain Layers
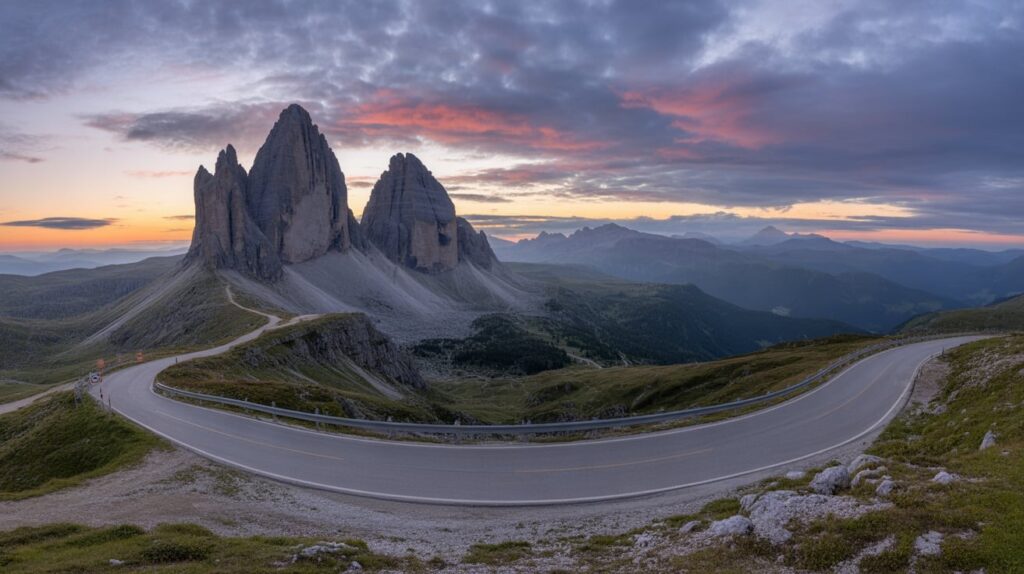
Passo Giau is a high mountain pass where sunrise brings fast-changing color across multiple ridgelines. Park early and walk a short distance off the road for a cleaner foreground. Use rocks or alpine grass to add texture at the bottom of the frame. Aim toward the surrounding peaks for stacked silhouettes and depth. When the first warm light appears, expose carefully to keep the sky in detail. Capture a second series when shadows stretch across the slopes.
This pass sits between Cortina d’Ampezzo and Selva di Cadore, which makes it a strong base for nearby rifugi. If clouds move quickly, shoot a burst of frames to catch brief light windows. A polarizer can deepen the sky, but remove it if the scene looks uneven. For variety, include the road as a subtle leading line without letting it dominate.
4) Cinque Torri from the Chairlift Viewline
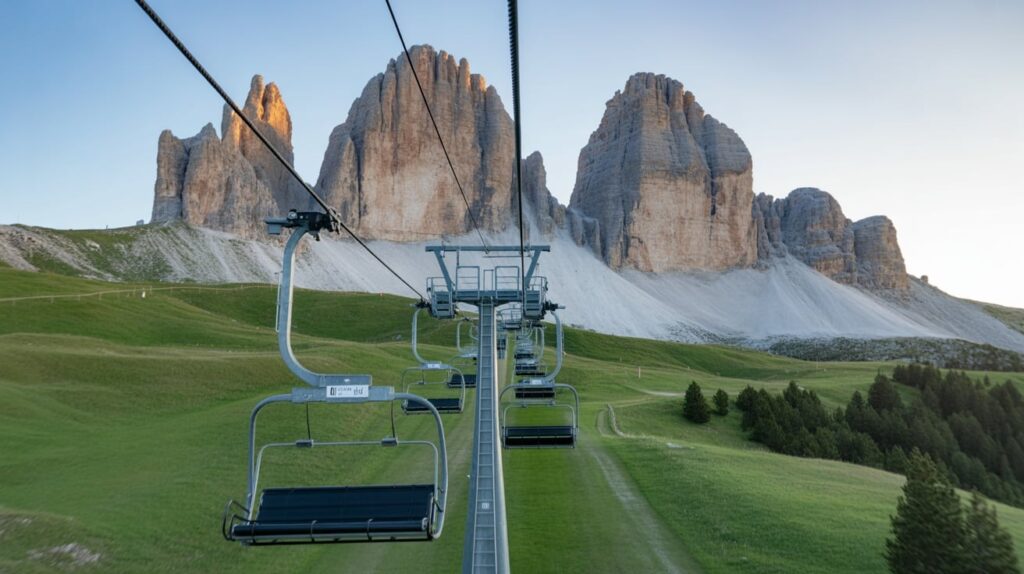
Cinque Torri is a perfect “arrival” photo because the towers rise suddenly as you gain elevation. Start at the 5 Torri chairlift and shoot through the lift line for a strong leading perspective. Once near the top, frame the towers with an open meadow in front for scale. Morning light keeps the rock bright without harsh glare. Walk a few minutes for a cleaner angle away from lift infrastructure. Finish with a wide shot that shows towers, trails, and the surrounding peaks together.
The 5 Torri chairlift runs seasonally and is the easiest access for quick photos. If you prefer hiking, you can still use the lift corridor as a compositional guide. Try a vertical frame with the towers in the top third and the meadow path below. For detail, switch to a longer lens to isolate climbers on the rock.
5) Rifugio Scoiattoli Terrace Viewpoint (Cinque Torri Area)
Rifugio Scoiattoli gives you an elevated viewpoint that feels made for panoramic photos. Arrive when the light is still soft and the terrace is quiet. Shoot wide to capture the hut as a foreground anchor with peaks layered behind it. Then turn your camera outward and frame the towers with open sky for a clean silhouette look. Include a few hikers for scale, but keep the scene uncluttered. A slightly lower angle helps the peaks look taller and more dramatic.
This hut is commonly reached from the Bai de Dones starting area, using the lift network or trails. Keep your horizon straight, because the sweeping views can tilt easily in wide-angle shots. If the terrace is busy, move a few steps away and use the railing as a subtle frame. The Cinque Torri area is also great for late afternoon light, so consider a return pass.
6) Rifugio Averau Golden Hour (Forcella Nuvolau)
Rifugio Averau sits in a position that naturally creates layered backgrounds in every direction. Photograph it with warm light to make the building glow against pale rock. Start with a wide frame that includes the hut, the trail, and a dramatic ridge line. Then shoot details like windows, signs, and textures for a Pinterest-friendly variety. The best look comes when the sun drops low and shadows carve the mountains. Keep your exposure slightly under to hold sky color and highlight control.
The hut is located at Forcella Nuvolau in the Lagazuoi–5 Torri–Giau area, and it is reached on foot. If you want a clean terrace shot, arrive early and choose a corner that shows peaks beyond the tables. For a strong storytelling image, include a cup or plate in the foreground and mountains behind. Confirm access routes and lift timing for your approach day.
7) Rifugio Nuvolau 360° Panorama (The Classic “Top” Shot)

Rifugio Nuvolau is famous for its open, high-perched viewpoint that reads instantly in photos. Shoot at sunrise for calm light and fewer harsh shadows. Start with a wide shot showing the hut perched above steep rock for scale. Then rotate and capture a panorama series, keeping overlap for easy stitching. Look for cloud movement to add atmosphere behind the building. If the sky is clear, emphasize the clean horizon and the rugged silhouette line.
Rifugio Nuvolau is at 2,575 m and is known as the oldest hut in the Dolomites, which adds story value to your captions. Keep people small and spaced out to avoid crowd compression. A short telephoto helps isolate the hut against distant peaks. Even in summer, conditions can feel cold at this altitude, so keep batteries warm for longer sessions.
8) Lagazuoi Cable Car “Above the Pass” View
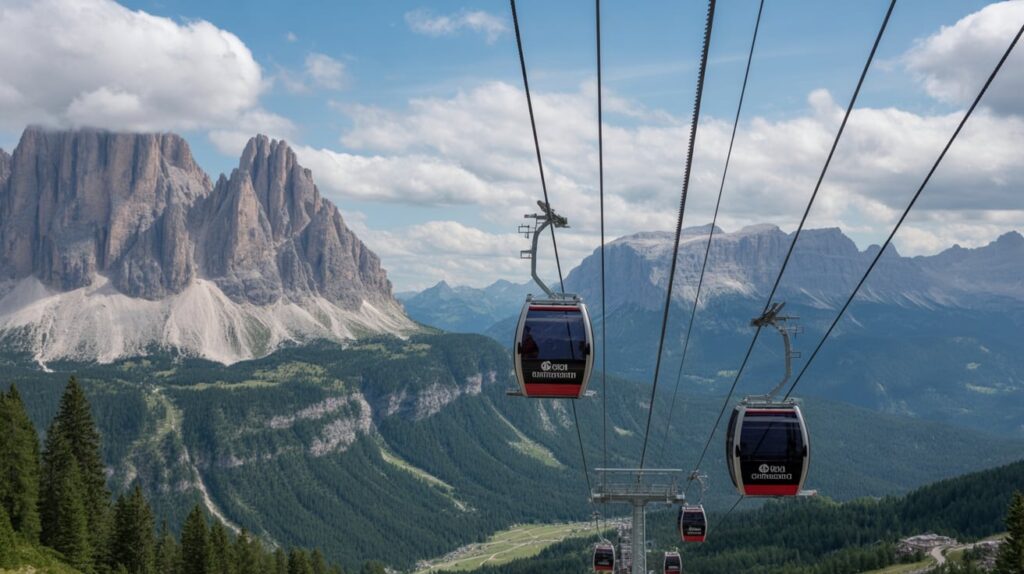
The Lagazuoi cable car creates instant visual drama because it climbs quickly above the pass. Photograph the cabin from below with the cables leading straight into the mountains. Then shoot from the top station toward the pass for a strong “tiny world” feeling. Clouds often build here, so watch for light beams and shifting contrast. A fast shutter keeps the cabin sharp if you capture motion. For Pinterest variety, take one wide establishing shot and one tight cabin detail.
This reversible aerial tramway runs from Falzarego Pass up toward the Lagazuoi summit area in just minutes. The elevation change is a big part of the story, so include the valley floor whenever possible. If you arrive near the opening, the light is cleaner and crowds are lighter. Always verify the seasonal timetable directly with the operator.
9) Rifugio Lagazuoi Terrace (Signature Dolomites Balcony)
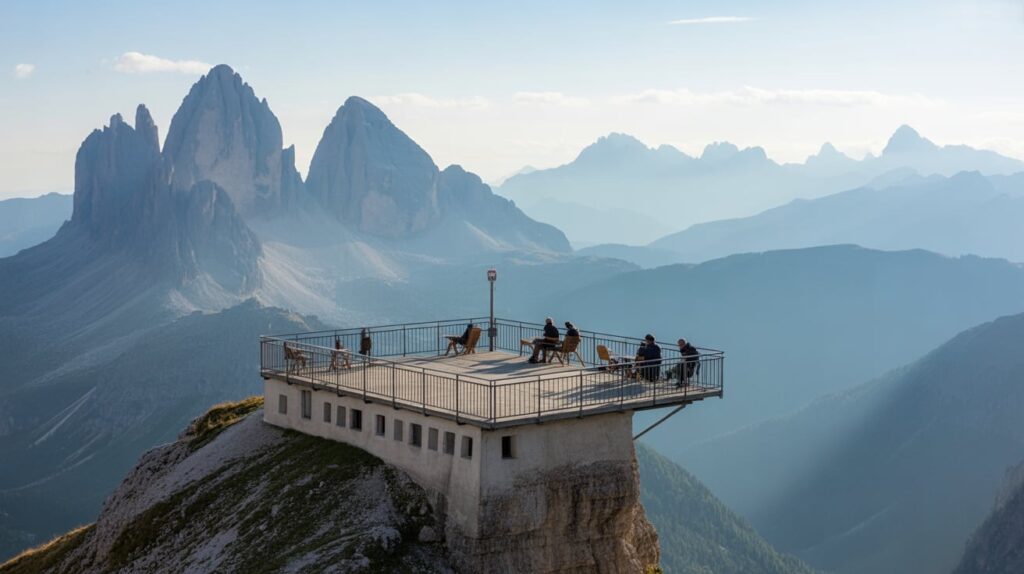
Rifugio Lagazuoi’s terrace is one of the best “sit and shoot” viewpoints in the region. Start with a wide frame that shows the terrace edge and the sea of peaks beyond. Then switch angles and use the railings as leading lines into the panorama. Early light often brings haze that makes the layers look deeper. If clouds sit low, shoot silhouettes and expose for the brighter sky. Capture a few lifestyle shots with hands, mugs, or jackets to make the scene feel lived-in.
Rifugio Lagazuoi sits above Falzarego Pass and is closely connected to the Lagazuoi lift system. For clean images, choose a viewpoint with minimal signage and keep the horizon level. A longer lens can compress mountain layers and highlight jagged profiles. If the terrace is crowded, frame tighter and use shallow depth to simplify the scene.
10) Marmolada Cable Car to Punta Rocca (Glacier + Vast Views)
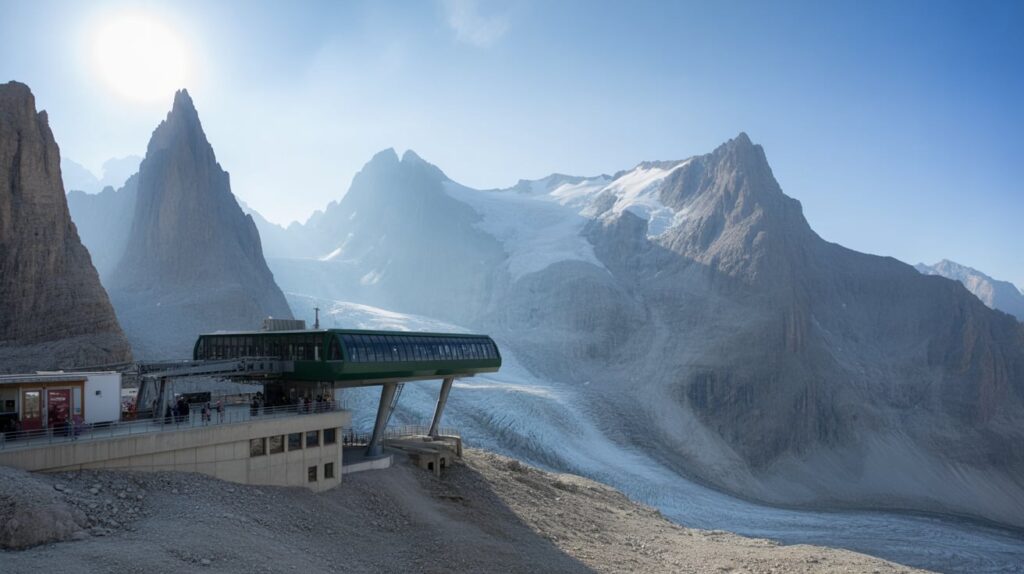
Marmolada delivers a different look because the high elevation adds glacier and wide-open sky. Begin at Malga Ciapela and photograph the lift infrastructure with peaks towering behind it. Then, once higher, shoot outward for broad, sweeping views that feel almost aerial. Keep the horizon high to emphasize the landscape below. If the sky is clear, include small figures near railings for scale. Capture a second set of images focused on textures: ice, rock, and cable lines.
The Marmolada lift system connects Malga Ciapela up toward Punta Rocca via intermediate stations. The official lift information confirms the route and altitude jump, which helps make captions more precise. Because conditions change fast, protect your gear from wind and sudden temperature shifts. Check the operator’s official schedule before planning this day.
11) Sass Pordoi “Terrace of the Dolomites” (2950 m)
Sass Pordoi is known for its “terrace” look, where the terrain feels like a rocky balcony above everything. Start with a wide shot that shows the plateau texture in the foreground. Add a small subject near the edge to show scale without clutter. The best light comes when shadows are long, so aim for early or late day. If the sky is dramatic, keep more negative space above the peaks. Then capture a second frame isolating a single peak line in the distance.
The Sass Pordoi cableway is the direct access for reaching the terrace area, and the operator lists seasonal hours and pricing. Once at the top, walk away from the station for cleaner compositions. If visibility is sharp, try a stitched panorama for a classic postcard frame. Confirm operating dates and closing times before you build your itinerary.
12) Tofana – Freccia nel Cielo (Cortina’s Big View Ride)
Freccia nel Cielo gives you a multi-stage ascent that creates several distinct photo zones. Start by shooting the valley from lower stations for a strong “before” view. As you climb higher, capture the changing landscape with tighter frames. At the top areas, emphasize the feeling of height by including cliff edges and distant ridgelines. Keep people near railings small to show scale, but avoid crowd clusters. If clouds move in, silhouettes and moody contrast can look stronger than clear skies.
The official “open lifts” information describes the summer stages to Col Druscié, Ra Valles, and Cima Tofana. That structure makes planning easier, since you can shoot multiple elevations in one ride. Bring a lens cloth, because wind can carry mist or dust across glass and filters. Always confirm the lift schedule close to your travel dates.
13) Faloria Cable Car Over Cortina (Classic Basin View)
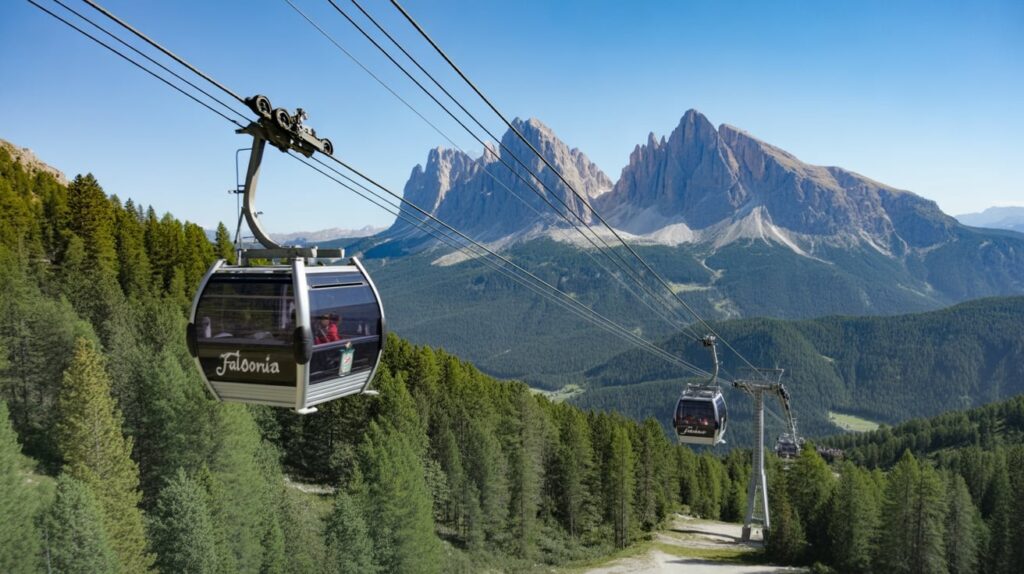
Faloria is a strong choice when you want a clean overview of Cortina’s basin and surrounding ridges. Photograph the cable car line with the valley beneath to show scale. Once at higher viewpoints, shoot wide frames that include both forest texture and far peaks. The light often looks best in the morning, when haze is minimal and contrast is balanced. For variety, capture a tight shot of cabins against the sky, then a wide shot of the full landscape. Keep the horizon stable for a polished pin image.
The Faloria lift history and operations are documented by the operator, and Dolomiti Superski also lists Cortina lift status. That makes Faloria useful for structured itinerary planning. If you want “clean” photos, step away from buildings and shoot toward open ridgelines. Weather can shift quickly, so take a fast set of frames when the light looks right.
14) Lago di Braies Sunrise Reflections (The Icon Shot)

.
Lago di Braies rewards sunrise because the water is calm and reflections feel like a mirror. Arrive early to photograph the first alpenglow on the peaks without heavy foot traffic. Start with a wide frame from the shoreline to capture reflection symmetry. Then shoot a tighter crop focusing on the color band where the mountains meet water. If the lake has mist, expose gently to keep the atmosphere soft. Finish with a detailed shot of ripples, rocks, or the dock for extra pin variety.
Many photographers plan dawn sessions here because crowd pressure rises later in the morning. A tripod helps for low light and clean reflections, but handheld can work with careful settings. If the water is not fully still, aim for partial reflections and emphasize texture. Keep your edits natural so the lake color stays believable and timeless.
15) Lago di Carezza (Karersee) Morning Mirror
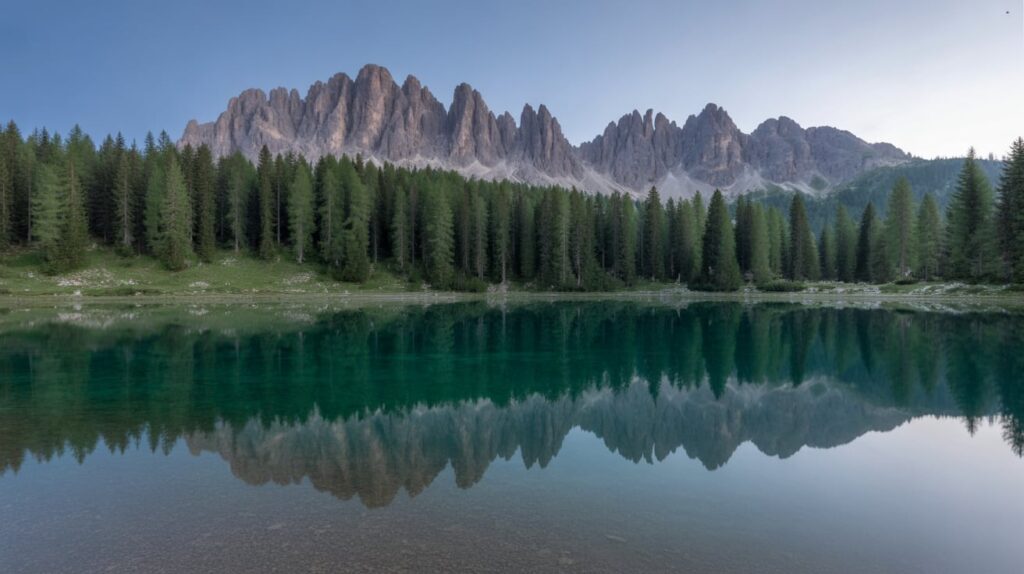
Lago di Carezza is a compact lake with dramatic reflections, so composition matters more than distance. Walk the loop and look for angles where the Latemar group sits cleanly above the waterline. Photograph in the morning when the surface can be calmer and light is softer. Start with a wide frame to show the full reflection. Then switch to a longer lens for compressed mountain detail and color layers. If the lake is bright, lower your exposure slightly to protect highlights.
Photography guides for Karersee often recommend wide lenses for the full scene, then longer lenses for scale and compression. Keep a clean shoreline in your frame, since small branches can distract in vertical pins. If the water is rippled, focus on the mountain shape and treat the reflection as texture. Simple edits and straight horizons help this location look premium on Pinterest.
16) Lago di Sorapis (Turquoise Payoff Shot)
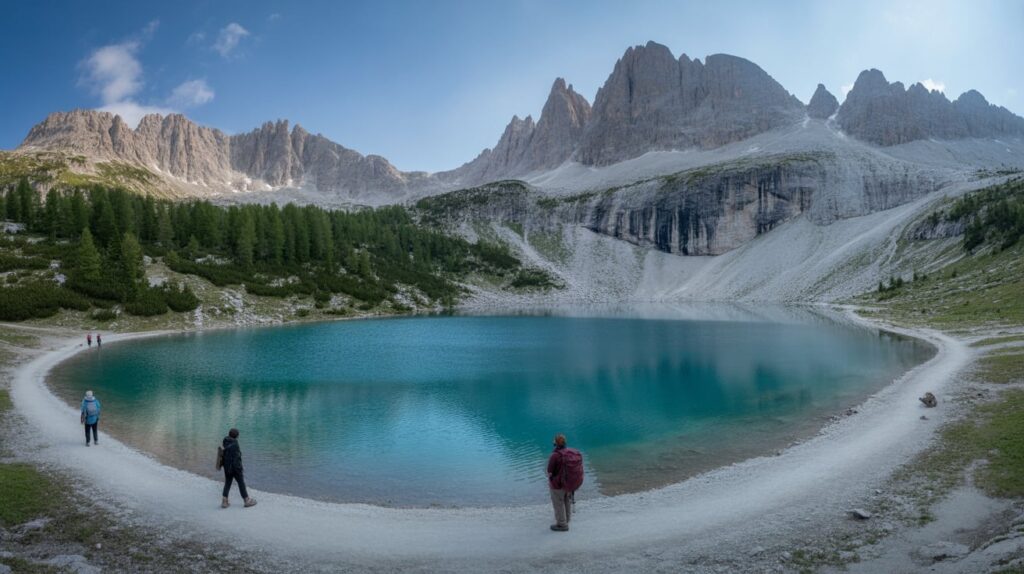
Lago di Sorapis stands out because the water color is unique and reads instantly in a vertical pin. Compose with rocks or shoreline at the bottom to anchor the frame. Keep the lake centered and let the surrounding peaks form a natural bowl shape. If the light is harsh, shoot slightly off-angle to reduce glare and keep the turquoise tone realistic. A person near the edge helps show scale, but keep them small. Capture both a wide scene and a tighter color-focused crop.
The hike commonly starts at Passo Tre Croci on trail 215, with sections that feel airy in places. Start early for calmer light and fewer people around the lake edge. If clouds arrive, the lake color can look even richer, so keep shooting through changing weather. Bring steady footwear and protect your camera from bumping against rock walls and cables.
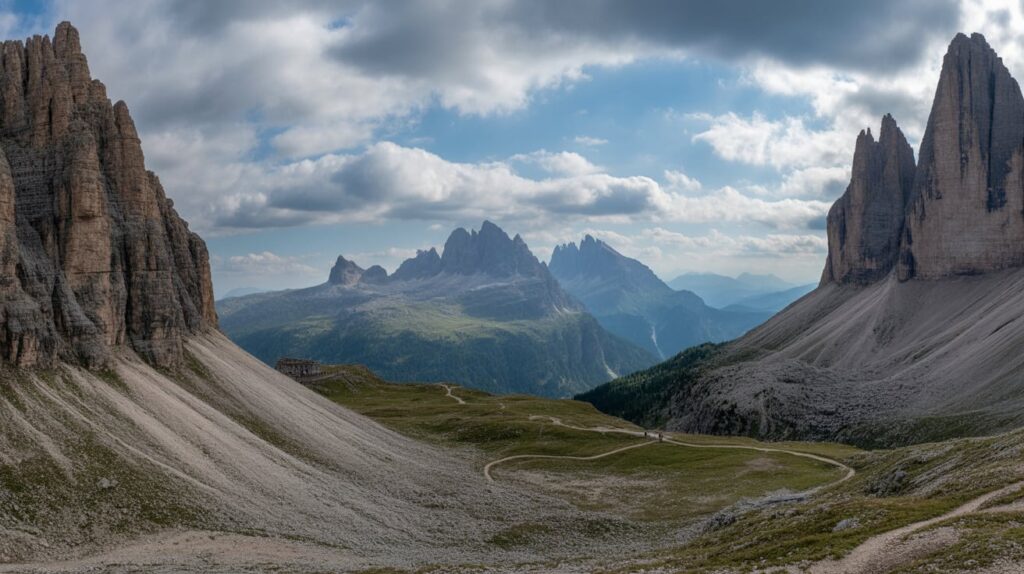
17) Cadini di Misurina Viewpoint (Trail 117)
Cadini di Misurina is a short, powerful viewpoint that looks cinematic even in simple edits. Arrive early and shoot the ridgeline with a clean subject line against the peaks. A vertical frame works best because it shows the drop and the layered spires. If the sky has color, keep it in the top third and let the mountains dominate. Take a second set of photos that includes a small hiker for scale. Avoid clutter by waiting for gaps between groups before pressing the shutter.
Most guides describe the start from the Rifugio Auronzo area, following trail 117 toward the Cadini direction. The viewpoint is popular, so timing matters for clean compositions. Use a slightly longer lens if crowds are heavy, because it crops out the busiest trail sections. Keep your footing stable and stay aware of edges while framing.
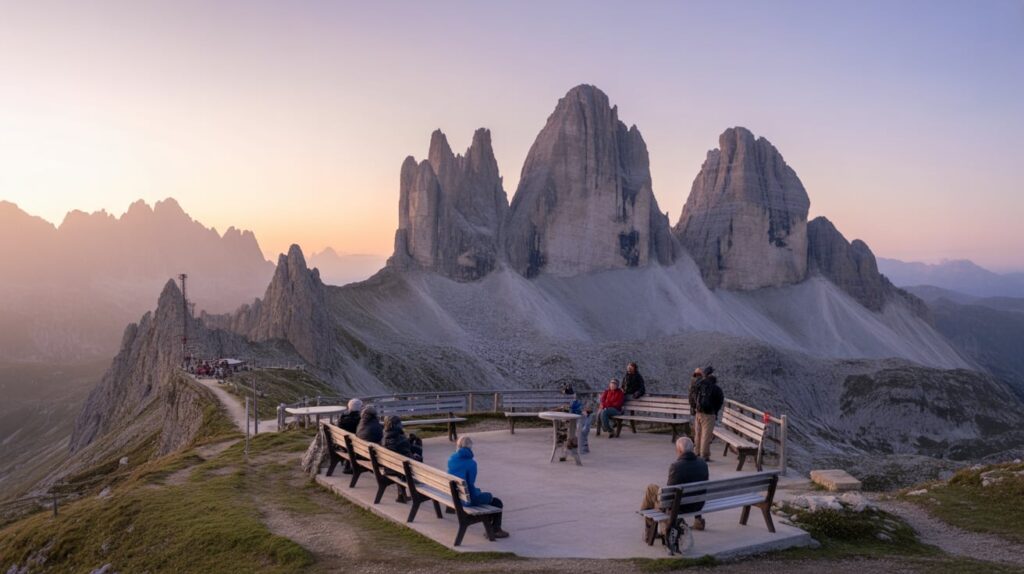
18) Rifugio Auronzo Base Views (Tre Cime Starting Point)
Rifugio Auronzo is a strong “start of the day” photo stop because it places you right under Tre Cime’s south faces. Shoot in early light when the rock looks warm and the parking area is quieter. Frame the hut low in the image and let the peaks fill the top. Include a few hikers walking away to create a story of motion and scale. Then switch to a tighter crop focusing on the peak shapes and the hut sign. This combination gives you both context and detail.
Rifugio Auronzo is described as the main starting point for exploring Tre Cime, with access via the road from Misurina. If you arrive before the busiest hours, you can get clean frames without cars dominating the scene. Use a wide angle for the full peak height, then a short telephoto for textured rock. Keep lines straight, because mountain walls exaggerate tilt easily.
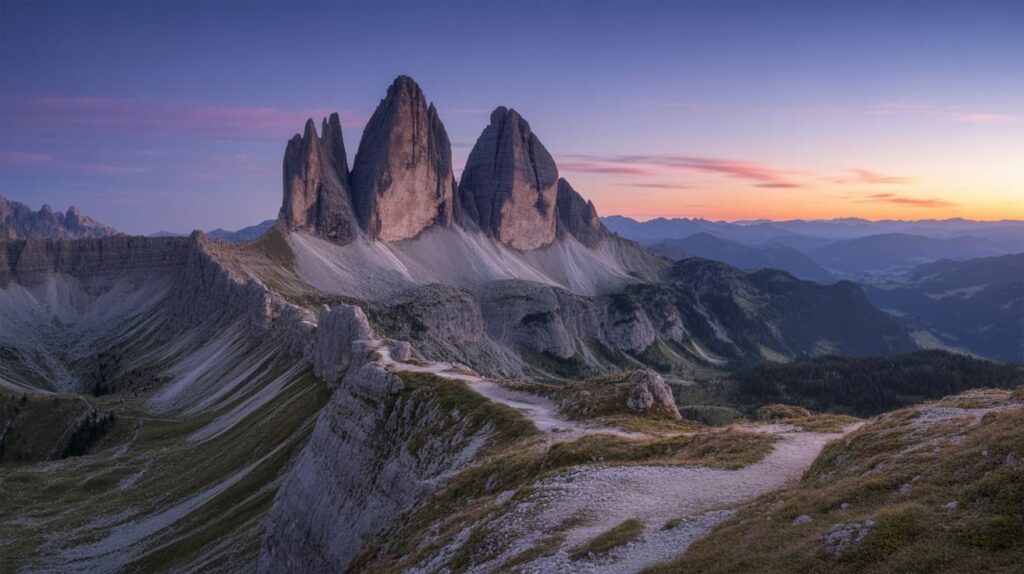
19) Tre Cime Sunrise on the Loop (Soft Alpenglow Frames)
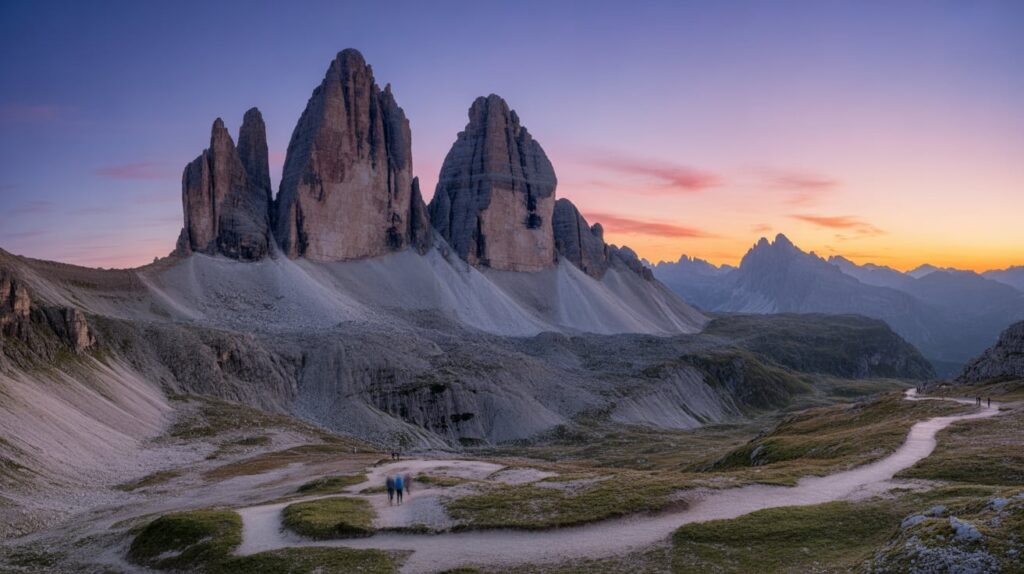
Tre Cime at sunrise gives you a softer, more pastel version of the peaks than midday contrast. Start near Rifugio Auronzo and move onto the loop trail while the sky is still cool. Look for trail curves that guide the eye toward the three towers. Shoot wide to show the full scale, then take a second frame focused on alpenglow on the upper rock. If clouds catch light, keep more sky in the frame for color. The goal is a clean, iconic silhouette with gentle warmth.
Many route descriptions confirm the loop’s starting point at Rifugio Auronzo and highlight how popular this circuit is. If you want cleaner shots, keep moving a few minutes beyond the first crowded viewpoints. A tripod can help for the earliest light, especially if you prefer low ISO. For Pinterest, a vertical frame with a visible trail often performs better than a flat panorama.
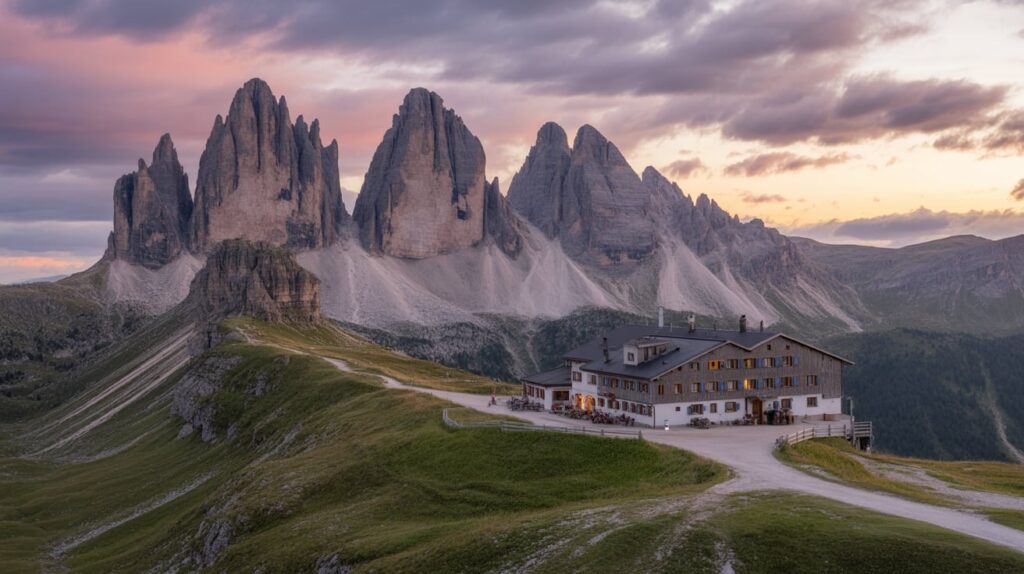
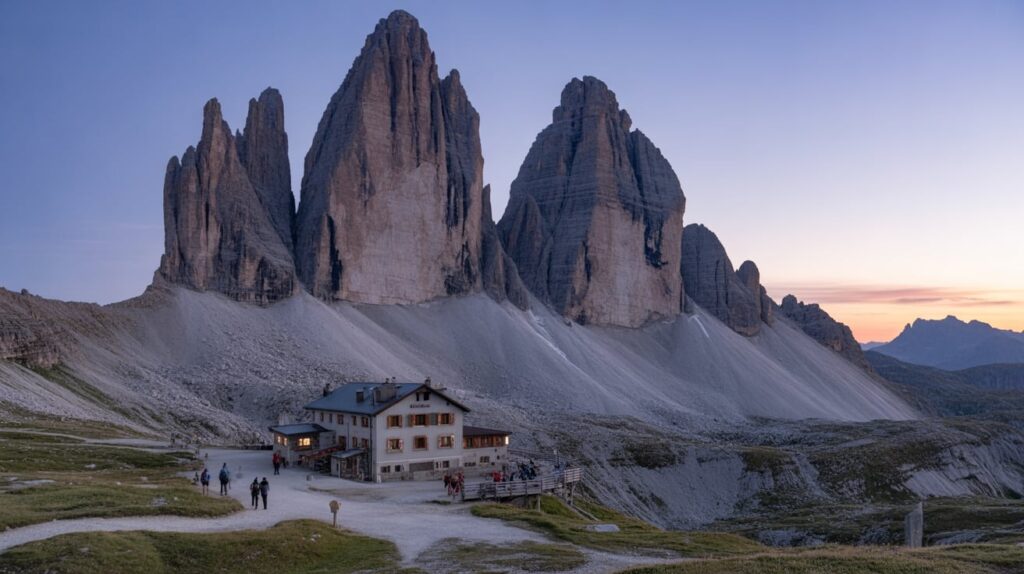
20) Rifugio Locatelli (Dreizinnenhütte) Panorama Terrace
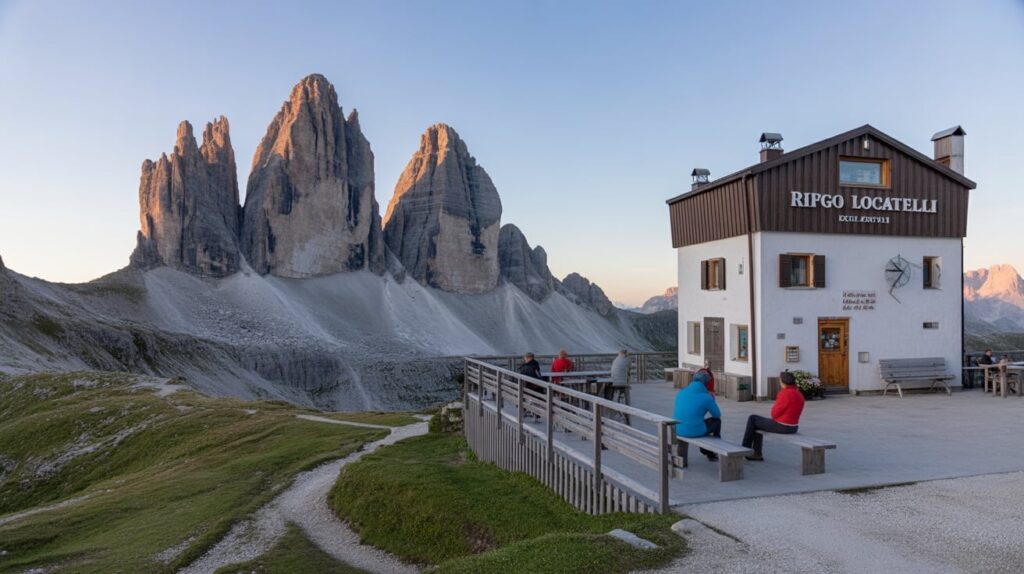
Rifugio Locatelli is famous for its terrace views straight toward Tre Cime and nearby peaks. Arrive when light is balanced and the terrace still feels calm. Compose with the terrace edge in the foreground to give depth and context. Then shoot outward with Tre Cime framed cleanly above the hut line. A second photo set with tighter crops works well for Pinterest, because it highlights peak shapes and texture. If haze appears, treat it as a layering tool rather than a problem.
Local information pages describe the hut as sitting at about 2,438 m with a large panorama terrace. That detail helps you write accurate captions and alt text. The easiest approach is commonly listed from Rifugio Auronzo via path 101. If the terrace is busy, step to the side and isolate the view with a longer lens.
21) Val di Funes: St. Magdalena Church Viewpoint (Odle Peaks)
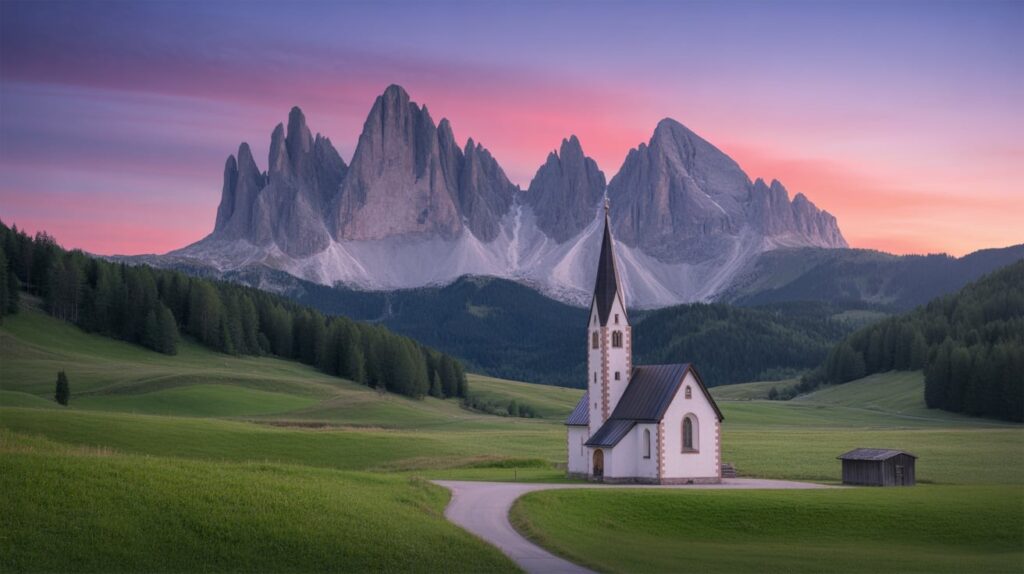
The St. Magdalena viewpoint in Val di Funes is a classic composition: a small church under sharp Odle peaks. Shoot early or late for softer light that keeps the valley calm and less reflective. Frame the church in the lower third and let the Odle ridge fill the top. Keep the foreground clean by choosing an angle with minimal fences and poles. Take one wide shot for context, then a tighter crop focusing on the church and the peak line. This stop creates a strong “storybook” pin.
Photography guides highlight the St. Magdalena church viewpoint as popular, so timing helps avoid crowded edges. If clouds sit behind the peaks, the scene looks more dramatic and layered. Keep colors natural and avoid oversaturation, since the valley greens can shift quickly in edits. For added variety, shoot a second frame focused only on the Odle peaks with a small village line beneath.
22) Geisleralm and Odle “Mountain Cinema” Meadows
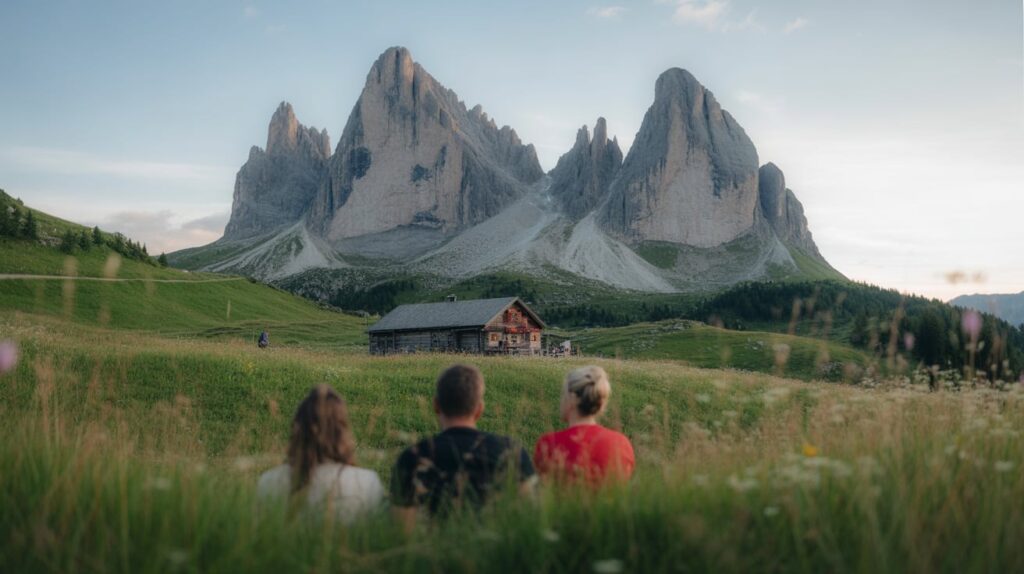
Geisleralm is an easy way to capture the Odle peaks with a peaceful meadow foreground. The scene works because the hut and pasture add scale and story. Photograph with a low angle to let grass lead into the peaks. Then take a second frame that isolates the hut against the mountain wall for a clean Pinterest pin. If clouds form, keep them in the background for texture without hiding the ridge. Golden hour gives the meadow a warm glow that looks natural and inviting.
The Geisleralm site describes its location in Val di Funes at 1,996 m, inside the Puez-Odle nature area, with broad panoramic views. Use that detail in captions for accuracy and stronger SEO. If the meadow is busy, move slightly off the main seating area and simplify your frame. Keep the peaks sharp, and let the foreground fall slightly softer for depth.
Here’s your SEO‑ready article setup for 22 Dolomites Photo Guide for Sunrise Spots, Rifugi Views, and Cable Cars:
Conclusion:
From sunrise over craggy peaks to the serene charm of rifugi and the motion of cable cars against alpine skies, the Dolomites offer endless photographic inspiration. With this guide, you’ll know exactly where to go to capture those iconic shots and frame your perfect memories. Whether you’re a seasoned photographer or an avid Instagrammer, these scenic spots will elevate your portfolio. Pack your lenses and let the Dolomites’ dramatic beauty lead your next photo adventure!