

A bathroom does not need to be huge, newly built, or professionally remodeled to feel beautiful. In many USA homes, the bathroom is one of the most-used rooms, yet it often gets stuck with builder-grade mirrors, harsh lighting, crowded counters, and storage that never quite works. The good news is that thoughtful weekend projects can change the way the space looks and functions without tearing everything apart. The best updates improve daily routines while making the room feel cleaner, warmer, brighter, and more intentional.
This guide is designed for homeowners, renters, apartment decorators, and DIY lovers who want practical projects that still look polished on Pinterest. These Bathroom Upgrades focus on the details people notice first: the vanity, mirror, lighting, shower area, shelves, finishes, towels, and storage. Each idea includes styling logic, useful materials, and real-life guidance so you can copy the look in a way that fits your budget, space, and skill level. The goal is a bathroom that feels calm, useful, and genuinely enjoyable every day.
1. Vanity Paint
- Refreshes an outdated cabinet without replacing the entire vanity.
- Adds color, contrast, and a more custom-looking focal point.
- Works with bonding primer, cabinet enamel, sanding blocks, and new pulls.
- Helps builder-grade bathrooms feel warmer, cleaner, and more intentional.
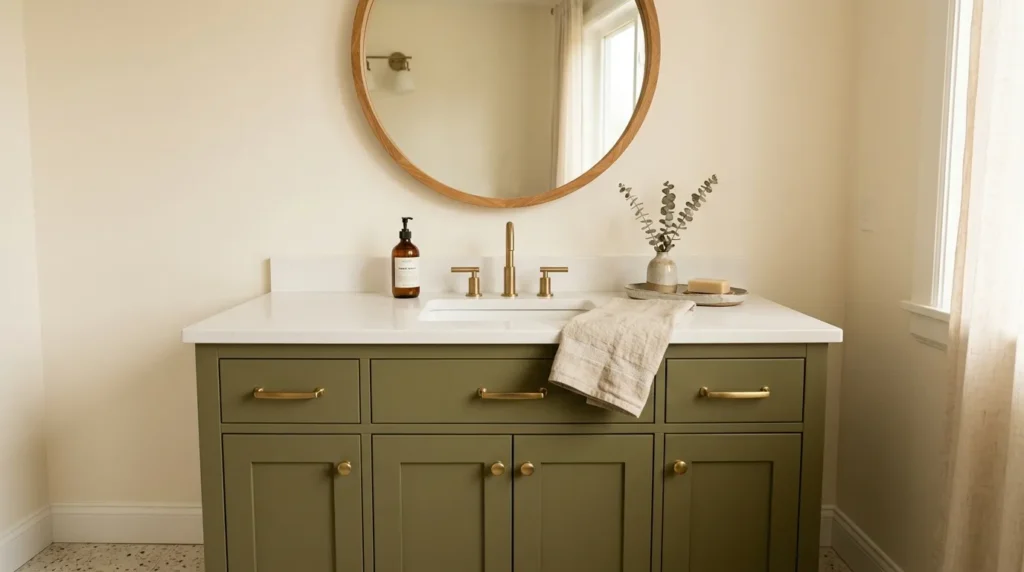
A painted vanity can make an old bathroom feel surprisingly new in one focused weekend. This upgrade works because the vanity usually anchors the room, so its color affects the whole mood. Start by removing doors, drawers, and hardware, then clean every surface to remove residue. Light sanding helps primer grip, especially on glossy cabinets. Use bonding primer and cabinet-grade enamel in satin or semi-gloss. Soft black, olive, navy, taupe, clay, cream, and warm greige all feel current without looking too trendy.
The transformation feels more polished when the paint connects with nearby details instead of standing alone. Add brass pulls for warmth, matte black knobs for contrast, or brushed nickel for a classic finish. In my experience, testing paint samples in the actual bathroom matters because vanity lights can make colors look cooler or darker. Let each coat cure properly before heavy use, especially around drawers and cabinet edges. Finish the area with a simple tray, fresh hand towel, and clean mirror so the vanity looks styled.
2. Mirror Cabinet
- Adds hidden storage without taking up floor space.
- Keeps skincare, medicine, razors, and daily products off the counter.
- Works with recessed, surface-mounted, arched, or framed designs.
- Makes small bathrooms feel brighter by reflecting more light.
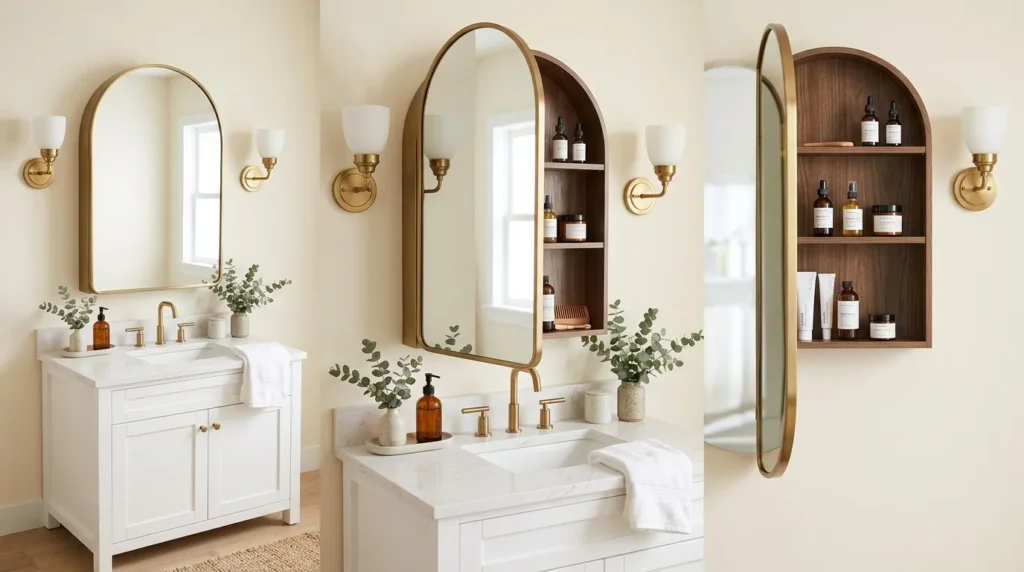
A mirror cabinet is a smart upgrade because it makes one bathroom feature do two jobs beautifully. This idea works by turning the mirror area into hidden storage, which is especially helpful in compact bathrooms with limited drawers. A surface-mounted cabinet is easier for many DIY projects, while a recessed version can look more built-in if your wall allows it. Measure around sconces, faucets, backsplash height, and outlets before buying. Choose adjustable shelves inside so bottles, toothpaste, and grooming tools fit neatly.
The result is a cleaner vanity and a more useful morning routine, because daily items stop crowding the counter. A mirror cabinet with a brass, black, wood, or white frame can feel decorative rather than clinical. That’s why many designers recommend hidden storage in rooms that need calm but still require function. Use small bins inside the cabinet so products do not tumble forward. When essentials are easy to reach but not visible, the whole room feels less cluttered and more grown-up.
3. Warm Lighting
- Makes the bathroom feel softer, cleaner, and more flattering.
- Improves makeup, skincare, shaving, and nighttime routines.
- Works with sconces, vanity lights, dimmers, warm bulbs, or LED strips.
- Helps paint, tile, mirrors, and hardware look more expensive.
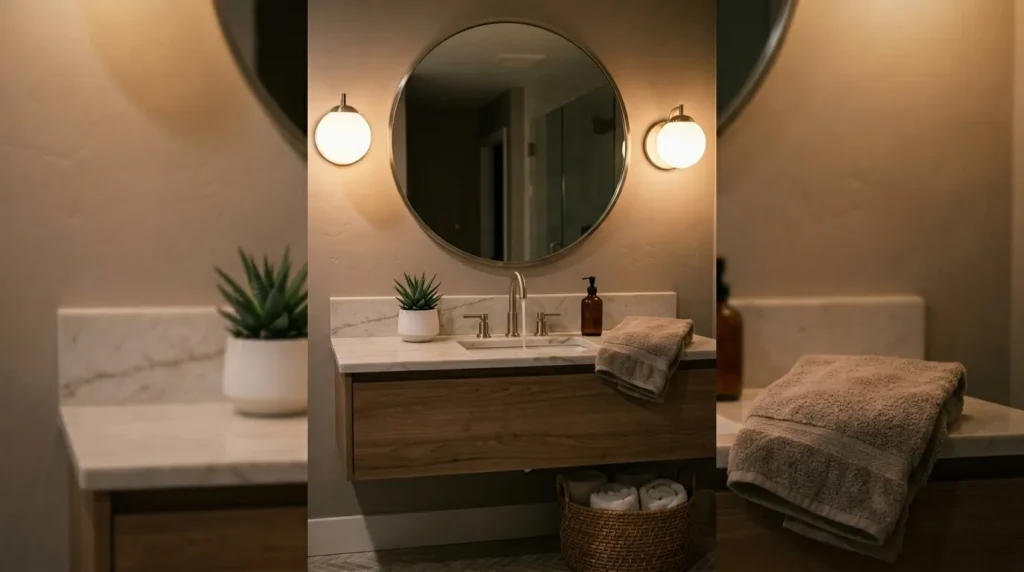
Warm lighting can change the entire feeling of a bathroom without touching the plumbing or tile. This upgrade works because harsh overhead light often makes even clean spaces feel cold and flat. Replace outdated vanity bars with modern sconces, or switch cool bulbs for warm white bulbs if the fixture is still usable. A dimmer can add flexibility where safe and allowed. For renters, rechargeable lights or plug-in sconces may create a similar glow without major electrical work.
The transformation shows up immediately because better lighting changes how every material looks. Warm bulbs make neutral paint richer, mirrors softer, and tile less clinical. In my experience, layered lighting works best: one practical light for cleaning, one flattering vanity source, and one softer glow for evenings. Keep bulb temperature consistent so the room does not feel mismatched. A simple lighting change can make an affordable mirror, painted vanity, and basic towels look much more intentional in photos and real life.
4. Shower Niche
- Adds built-in storage for bottles, soap, razors, and small decor.
- Keeps the shower floor, tub ledge, and corners less cluttered.
- Works with true recessed niches, wall boxes, or niche-style shelves.
- Creates a cleaner spa-inspired look in both large and small bathrooms.
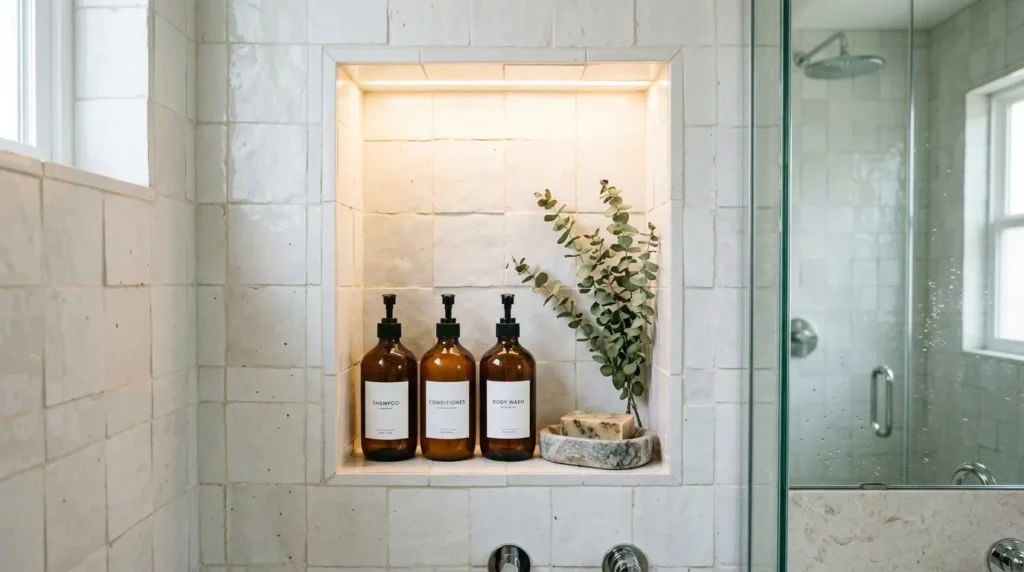
A shower niche makes the bathing area feel cleaner because every product finally has a defined place. This idea works best during a shower remodel, but you can copy the look with a shallow wall shelf or niche-style organizer if cutting into walls is not realistic. A true recessed niche requires checking plumbing, studs, waterproofing, and tile layout, so confident DIYers should plan carefully. For easier updates, choose a rust-resistant shelf that visually blends with tile and keeps bottles organized.
The transformation is practical and visual because the shower instantly looks less crowded. Matching refillable bottles, a simple soap dish, and a small eucalyptus bundle can make the space feel more spa-like. That’s why many designers recommend built-in or visually quiet shower storage when the goal is a calm bathroom. Keep only daily products inside the shower and store backups elsewhere. When the niche or shelf stays edited, older tile can look fresher because clutter is no longer stealing attention.
5. Peel Backsplash
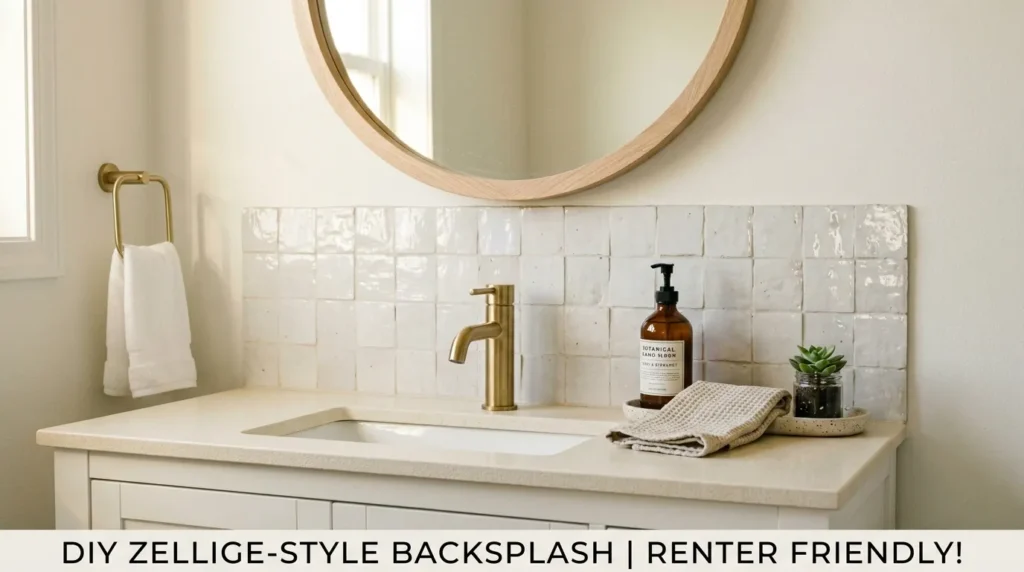
- Adds pattern or texture behind the vanity without real tile work.
- Helps protect walls from light splashes and toothpaste marks.
- Works with peel tile, adhesive panels, marble-look sheets, or zellige styles.
- Gives renters and budget decorators a fast visual upgrade.
A peel backsplash can make a plain vanity wall look finished without grout, mortar, or demolition. This upgrade works because the area behind the sink naturally draws attention, especially in small bathrooms. Clean the wall thoroughly, let it dry, and mark a level guideline before applying anything adhesive. Choose moisture-conscious peel tile or panels designed for bathroom use. Marble-look sheets feel soft, zellige-inspired tiles add texture, and clean white subway styles keep the look timeless.
The final result can feel surprisingly custom when the edges and layout are handled carefully. Start from a centered point whenever possible, trim cleanly around outlets, and caulk edges where light splashes may collect. Keep counter styling simple so the backsplash remains the focal point. In my experience, this project works beautifully in powder rooms, rental baths, and builder-grade spaces that need character without permanent renovation. Pair it with a better mirror and coordinated hardware for a stronger, more complete vanity refresh.
6. Floating Shelves
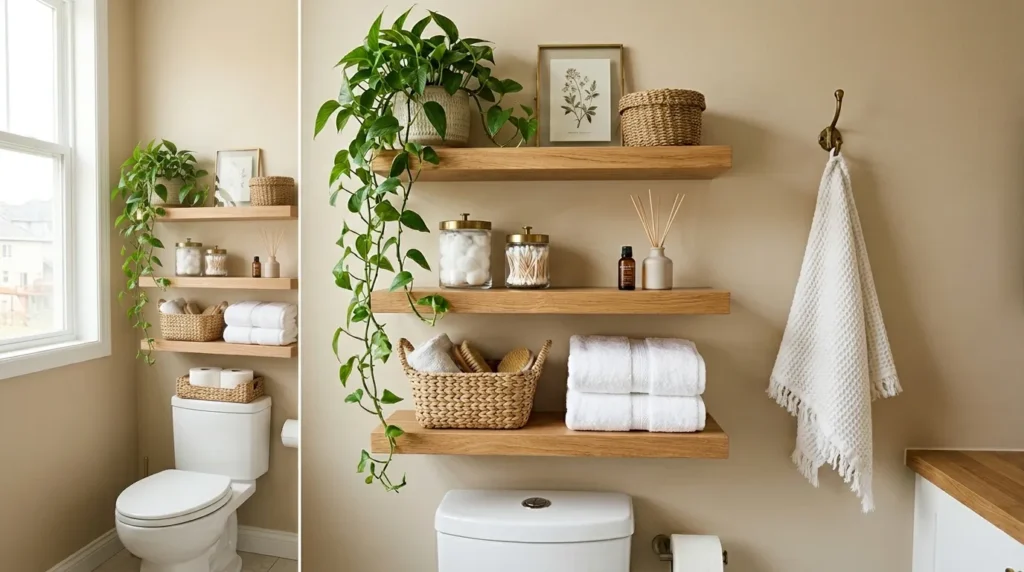
- Adds storage without using valuable floor space.
- Works above toilets, beside vanities, near tubs, or on narrow walls.
- Holds towels, jars, baskets, candles, plants, and extra supplies.
- Creates a decorative display while improving everyday function.
Floating shelves make empty bathroom walls work harder without making the room feel crowded. This idea works especially well above the toilet, beside a vanity, or on any narrow wall that cannot hold a cabinet. Use sealed wood, painted boards, metal ledges, or ready-made floating shelves that match the room’s style. Install them with proper anchors, especially if they will hold towels or jars. Keep the shelf depth shallow enough that people can move comfortably around the space.
The transformation comes from mixing storage with styling instead of treating shelves like a dumping zone. Fold towels neatly, place cotton rounds in clear jars, use baskets for extras, and add one plant or framed print for softness. I’ve noticed shelves look more expensive when containers repeat in color or texture. Leave breathing room between objects so the display feels calm. This upgrade is especially useful in bathrooms without linen closets because it gives everyday items a beautiful, reachable home.
7. Smart Hooks
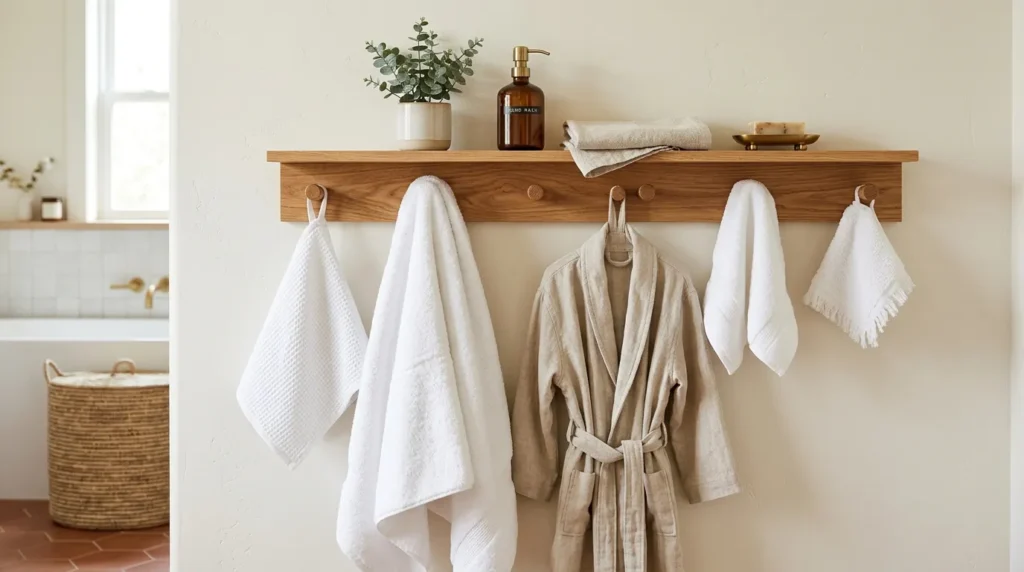
- Gives towels, robes, bags, and brushes a clear landing place.
- Works behind doors, beside showers, near vanities, or on narrow walls.
- Helps shared bathrooms stay cleaner between deep cleans.
- Adds style through brass, black, wood, chrome, or peg rail finishes.
Smart hooks can solve daily bathroom mess faster than another decorative basket. This upgrade works because towels and robes need airflow, but they also need a place that is easy to use. Install hooks behind the door, beside the shower, above a low shelf, or along a narrow wall. A wood peg rail feels warm and classic, while individual matte black or brass hooks look more modern. Use wall anchors when needed, since damp towels can be heavier than expected.
The result is a bathroom that feels more organized because items stop landing on counters, floors, and shower rods. In shared bathrooms, assign each person a hook to reduce towel confusion and clutter. That’s why many organizers recommend hooks over towel bars for busy families and kids’ bathrooms. Match the hook finish to the faucet, mirror, or cabinet hardware for a coordinated look. A simple hook wall can add rhythm, function, and polish without needing bulky furniture or expensive renovation.
8. Fixture Swap
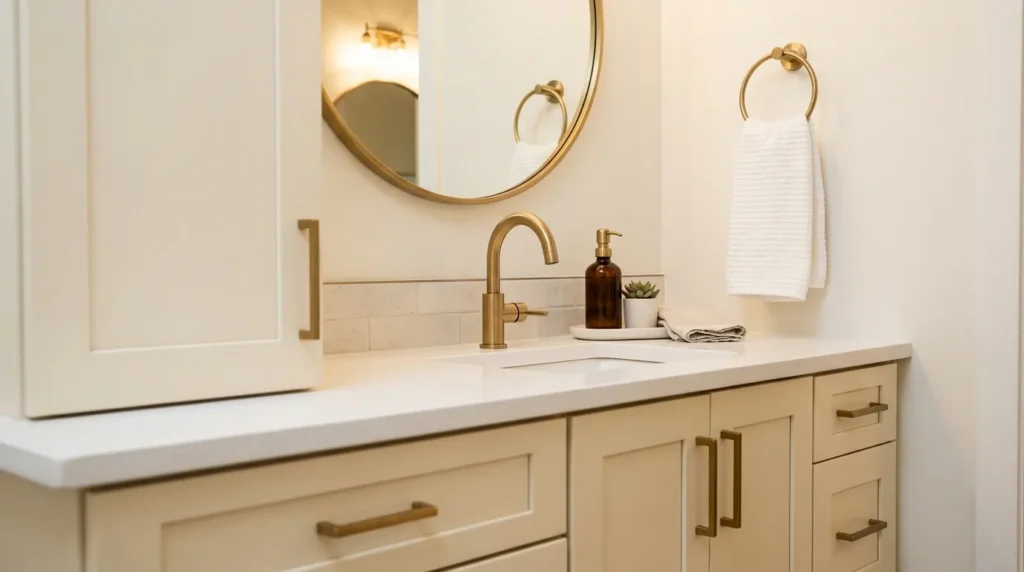
- Updates faucets, showerheads, towel bars, and toilet paper holders.
- Makes older vanities and showers feel fresher without full replacement.
- Works with brass, matte black, chrome, bronze, or brushed nickel.
- Improves both function and the overall visual style of the room.
A fixture swap can make a dated bathroom feel newer because metal finishes are small but highly visible. This idea works especially well when the faucet, towel holder, cabinet pulls, and showerhead currently look mismatched or worn. Start with the pieces people see and touch most often, such as the faucet and towel hooks. Choose one main finish, then repeat it at least two or three times around the room. Measure carefully before buying replacements so installation stays straightforward.
The transformation feels professional because repeated finishes create order in a compact space. Matte black adds contrast, brass brings warmth, chrome feels crisp, and brushed nickel works with almost every style. In my experience, this upgrade looks best when paired with a mirror refresh or painted vanity. If you are replacing a faucet, check sink hole spacing and shutoff valves first. A coordinated fixture plan can make budget materials look intentional because the eye sees a clear design story instead of random updates.
9. Texture Layers
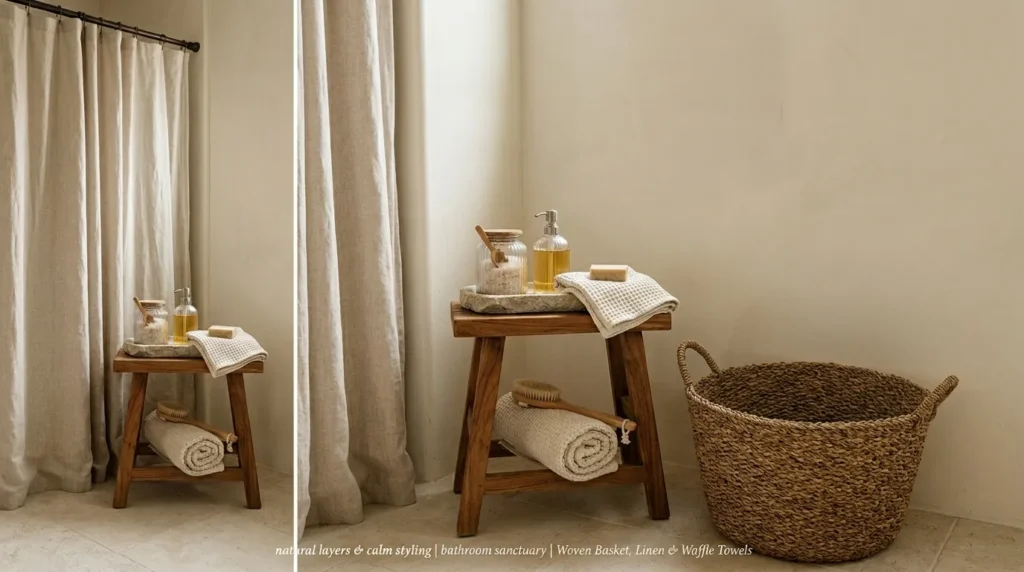
- Softens hard bathroom surfaces like tile, glass, porcelain, and metal.
- Works with baskets, waffle towels, wood stools, stone trays, and linen curtains.
- Adds warmth without needing bold color or busy pattern.
- Helps neutral bathrooms feel styled rather than plain.
Texture layers make a bathroom feel complete because they add depth beyond color alone. This upgrade works by mixing materials that look and feel different, such as woven baskets, stone trays, cotton towels, ceramic jars, linen curtains, and sealed wood accents. Bathrooms often have many hard surfaces, so softer textures keep the room from feeling cold. Start with one or two natural materials, then repeat them lightly. A woven basket under a vanity and a wood stool near the tub can be enough.
The result is subtle but powerful, especially in white, gray, beige, or builder-grade bathrooms. Waffle towels look spa-inspired, ribbed glass jars catch light, and stone trays make everyday soap feel elevated. That’s why many stylists use texture before adding more color. Keep the palette controlled so the room does not feel busy. I’ve seen this work well in many homes because it makes inexpensive decor feel collected. A few layered materials can make a simple bathroom photograph beautifully and feel warmer in daily use.
10. Grout Refresh

- Makes tile look cleaner without replacing it.
- Works with grout cleaner, grout pens, sealant, brushes, and caulk.
- Helps showers, floors, and backsplashes feel brighter.
- Improves the look of older bathrooms on a smaller budget.
A grout refresh can make old tile look dramatically cleaner even when nothing else changes. This project works because dingy grout lines make an entire bathroom feel tired, especially around floors, showers, and backsplashes. Start with a deep cleaning using a grout-safe cleaner and stiff brush. If stains remain, a grout pen can brighten the lines, while damaged caulk around tubs and sinks may need removal and replacement. Always let cleaned areas dry fully before sealing or recoloring.
The transformation is satisfying because tile suddenly looks sharper and more intentional. White grout can brighten classic tile, warm gray grout can soften contrast, and clean caulk makes edges look finished. In my experience, this is one of the best prep projects before taking photos, hosting guests, or listing a home. Keep ventilation strong while products cure, and follow instructions carefully around wet areas. Clean grout will not fix broken tile, but it can make a dated bathroom feel fresher, healthier, and better maintained.
11. Linen System
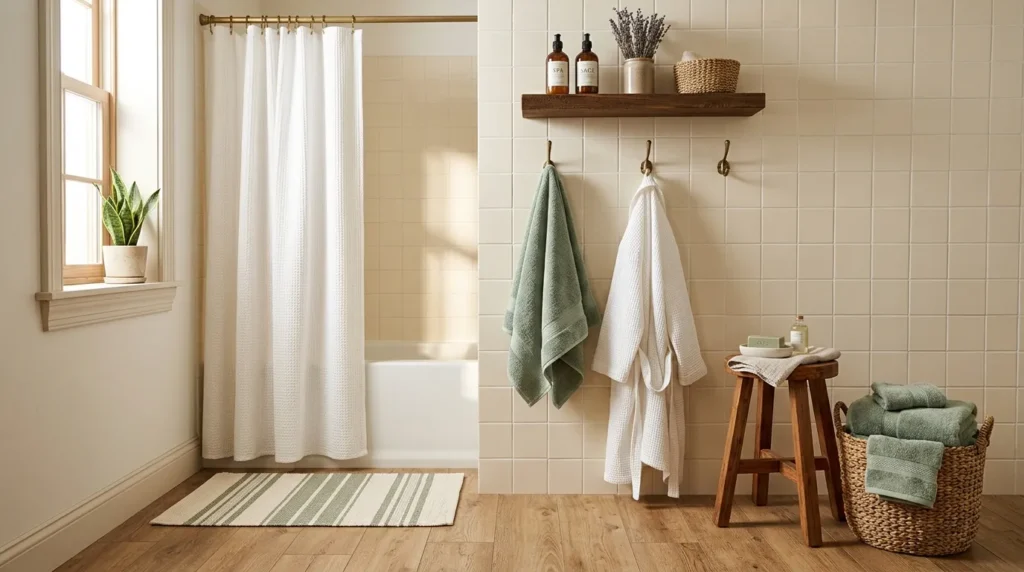
- Refreshes the room with towels, bath mats, curtains, and robes.
- Adds softness, color, and texture without permanent changes.
- Helps guest bathrooms feel ready and organized.
- Works with waffle towels, Turkish towels, linen-look curtains, and washable rugs.
A linen system gives the bathroom a finished look while making daily routines easier. This upgrade works because towels, mats, and shower curtains take up more visual space than people realize. Replace mismatched towels with a coordinated set, choose a washable bath mat, and upgrade a tired curtain if the tub area feels dull. White waffle towels feel hotel-inspired, sage feels fresh, charcoal adds contrast, and warm beige creates a soft spa mood. Choose fabrics that match your ventilation and lifestyle.
The final result is practical, affordable, and renter-friendly because nothing permanent has to change. Quick-dry towels are smart for humid or windowless bathrooms, while thicker cotton towels feel luxurious in well-ventilated rooms. A thoughtful linen plan can make Bathroom Upgrades feel complete because it ties together color, comfort, and everyday use. Store backups in baskets or shelves so the room stays tidy. When towels, mats, and curtains coordinate, the entire bathroom feels cleaner, softer, and more intentionally styled.