

A bathroom does not have to be large, new, or expensive to feel beautiful. In many USA homes, the bathroom is one of the hardest-working rooms, but it often gets updated last because people assume a full remodel is the only solution. The truth is, thoughtful DIY changes can make a basic bath feel brighter, cleaner, warmer, and more organized without replacing every fixture. A successful Bathroom Makeover usually starts with noticing what feels heavy, dated, cluttered, or unfinished, then improving those areas with smart, realistic upgrades.
This guide is written for homeowners, renters, apartment decorators, and weekend DIY lovers who want a bathroom that looks polished on Pinterest but still works for real life. These ideas focus on paint, storage, mirrors, lighting, hardware, textiles, shower styling, and final decorative details. Each tip includes practical materials, styling logic, and easy ways to make the space feel more intentional. Whether you are refreshing a powder room, guest bath, primary bathroom, or small shared space, these tips will help you create a room that feels cleaner, calmer, and more expensive than it really was.
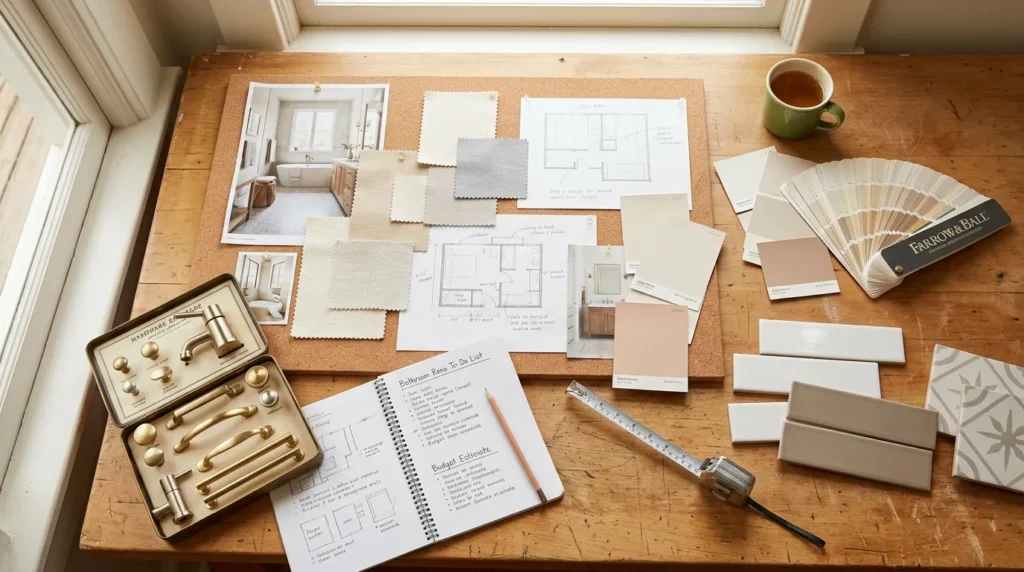
1. Clear Plan
- Helps you avoid buying random decor that does not work together.
- Makes the makeover feel more organized, affordable, and less stressful.
- Works best with a mood board, measurements, budget list, and project timeline.
- Helps connect paint, storage, hardware, lighting, towels, and accessories.
- Gives the finished bathroom a more polished and intentional look.
A clear plan is the smartest first step because it keeps your bathroom update from turning into a pile of unrelated purchases. Before buying paint, shelves, mirrors, or storage bins, look at what the room actually needs. Measure the vanity, walls, floor area, shower opening, and empty storage zones. Save a few Pinterest photos that share the same mood, whether that is spa neutral, modern farmhouse, coastal, vintage, or clean minimal. This helps every later decision feel easier and more connected.
The transformation starts before anything is installed because planning gives the room a direction. A small bathroom can quickly feel messy if every item has a different finish, color, or style. In my experience, choosing three main finishes or tones is enough for most DIY updates. For example, warm white walls, light wood, and brushed brass create a calm look. Matte black, soft gray, and white feel more modern. When the plan is simple, even budget materials can look thoughtful, balanced, and surprisingly custom.
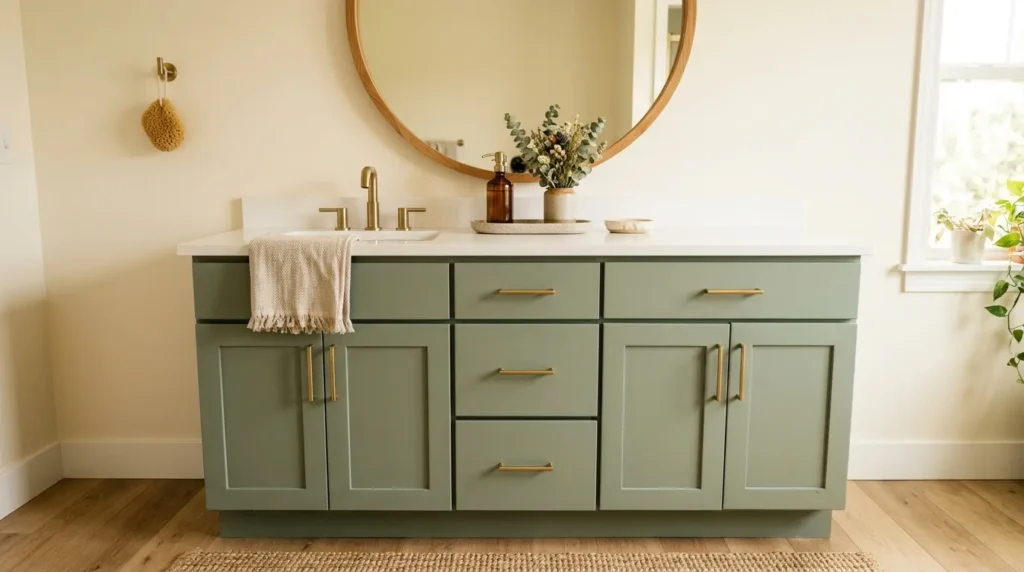
2. Vanity Refresh
- Updates the strongest visual feature without replacing the cabinet.
- Works with cabinet paint, primer, new pulls, contact paper, or a new faucet.
- Adds color, contrast, and personality to builder-grade bathrooms.
- Helps the sink area feel cleaner, newer, and more styled.
- Pairs well with mirrors, trays, towels, and lighting upgrades.
A vanity refresh can make an older bathroom feel dramatically newer without a full renovation. This tip works because the vanity usually sits at eye level and anchors the entire room. If the cabinet is still sturdy, paint it instead of replacing it. Clean the surface, sand lightly, apply bonding primer, and use cabinet enamel that can handle moisture. Add new knobs or pulls for a stronger finish. Deep green, warm taupe, navy, clay, cream, and soft black all create a fresh, current look.
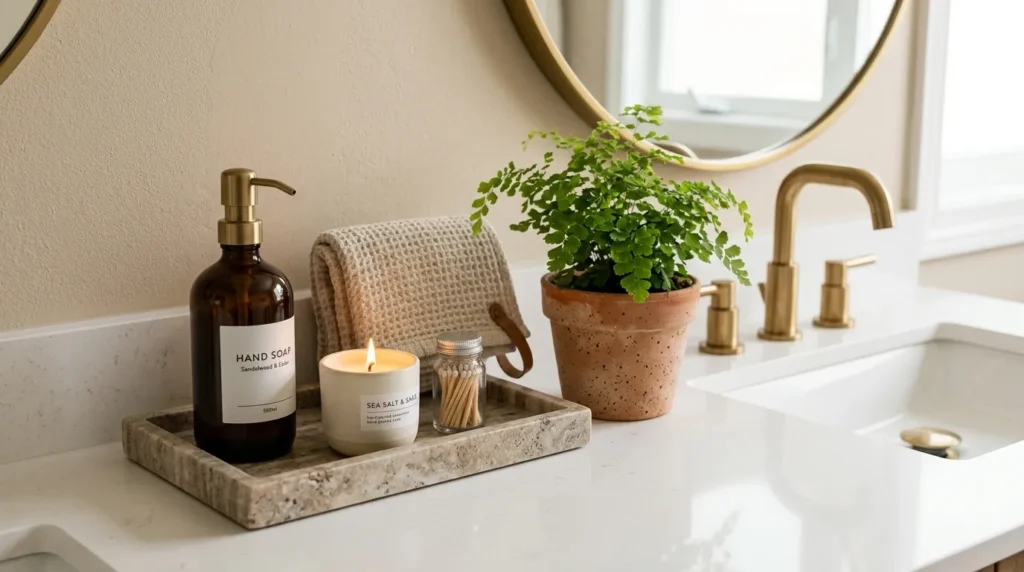
The result feels expensive when the vanity color connects with nearby details. A brass faucet can warm up a painted cabinet, while matte black hardware makes the area feel crisp. If the countertop is dated but still functional, style it with a stone tray, amber soap bottle, and folded hand towel to soften the surface. That’s why many designers recommend updating the vanity zone before making bigger changes. Once the cabinet, hardware, mirror, and counter styling work together, the whole bathroom feels more complete.
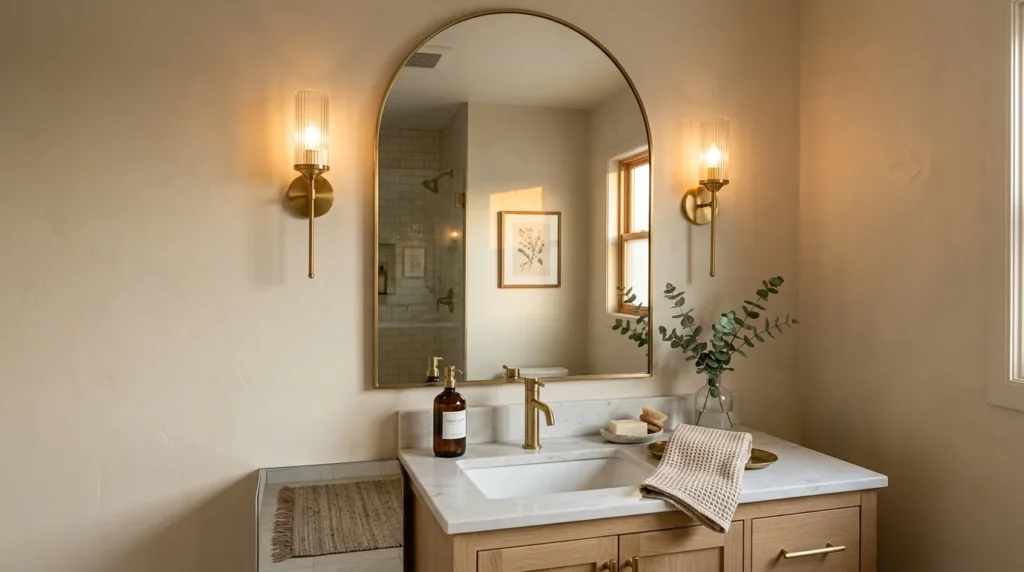
3. Mirror Upgrade
- Makes the vanity wall feel brighter, taller, and more finished.
- Works with arched, round, framed, wood, brass, black, or vintage mirrors.
- Reflects light and helps compact bathrooms feel more open.
- Adds style without changing plumbing, tile, or cabinetry.
- Creates a strong focal point for photos and daily routines.
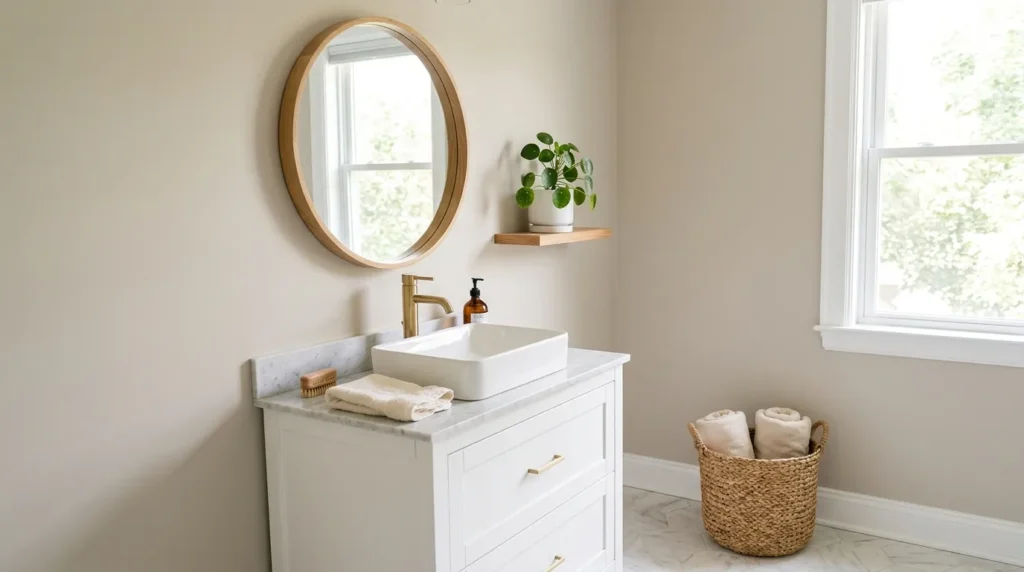
A mirror upgrade can change the entire mood of a bathroom faster than almost any other swap. This tip works because the mirror is one of the first things people see, and it shapes the whole vanity area. Replace a plain builder mirror with a framed round, arched, wood, brass, or matte black design. Measure carefully around sconces, faucets, backsplash height, and wall width before buying. The mirror should feel generous, but not crowded against nearby walls, shelves, or lighting.
The transformation is both stylish and practical because a better mirror improves light reflection and daily use. A round mirror softens sharp corners, an arched mirror adds height, and a natural wood frame warms up white tile. I’ve noticed this update works especially well in small bathrooms because it makes the room feel more open without removing anything. Pair the new mirror with warm bulbs, a simple soap dispenser, and one clean counter tray. The vanity instantly looks more thoughtful, styled, and Pinterest-ready.
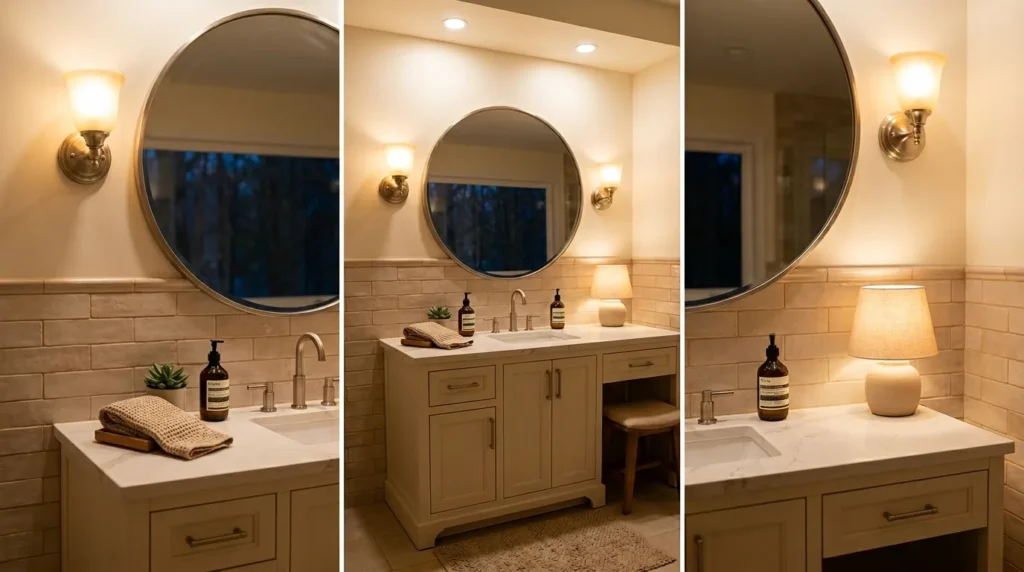
4. Light Layers
- Improves makeup, shaving, skincare, cleaning, and nighttime routines.
- Works with vanity lights, sconces, dimmers, ceiling fixtures, and plug-in lamps.
- Makes paint colors, mirrors, tile, and hardware look more polished.
- Helps windowless bathrooms feel warmer and less flat.
- Adds atmosphere without requiring a full remodel.
Layered lighting can make a budget bathroom look much more expensive because it changes how every surface appears. Harsh overhead light often makes tile, paint, and mirrors feel cold, even when the room is clean. Replace dated vanity bars with softer sconces, or simply switch cool bulbs to warm white bulbs if the fixture still works. Add a dimmer where safe, or use a small damp-rated lamp on a wide counter for a cozy evening glow. Lighting should feel useful and flattering.
The finished room feels calmer because the light supports different moments of the day. Bright ceiling light helps with cleaning, vanity lighting helps with grooming, and softer accent light makes the room relaxing at night. That’s why many designers recommend fixing lighting before buying more decor. In my experience, warm lighting also makes budget materials look richer. A simple mirror, painted vanity, and neutral towels can look completely different under better light. Good lighting makes the entire makeover feel more polished, even when the changes are small.
5. Wall Color
- Refreshes the entire bathroom without replacing fixtures.
- Works with warm white, sage, beige, clay, greige, navy, or soft blue.
- Helps hide dated walls, scuffs, and builder-grade finishes.
- Creates a strong backdrop for mirrors, shelves, art, and towels.
- Makes the room feel cleaner, calmer, or more dramatic depending on color.
Wall color can completely reset a bathroom because it surrounds every other design choice. This tip works whether you choose a light neutral, a soft earthy shade, or a bold powder room color. For full bathrooms, use moisture-friendly paint in satin or semi-gloss so the walls can handle steam and cleaning. Warm white brightens small rooms, sage feels fresh, clay adds warmth, and navy creates drama. Always test swatches near the mirror and shower because bathroom lighting can shift undertones quickly.
The transformation feels bigger when the wall color supports the mood you want. A pale color can make a narrow room feel open, while a deeper shade can make a tiny powder room feel cozy and intentional. If painting every wall feels too much, try one accent wall behind the vanity or above beadboard. I’ve seen this work well in many homes because paint creates impact without major cost. Finish with towels and accessories that repeat the wall color softly, so the room feels pulled together.
6. Shelf Storage
- Adds storage without taking up floor space.
- Works above toilets, beside vanities, near tubs, or on narrow walls.
- Gives room for towels, jars, baskets, candles, plants, and extra supplies.
- Helps small bathrooms feel organized and more decorative.
- Looks best when styled with breathing room and repeated textures.
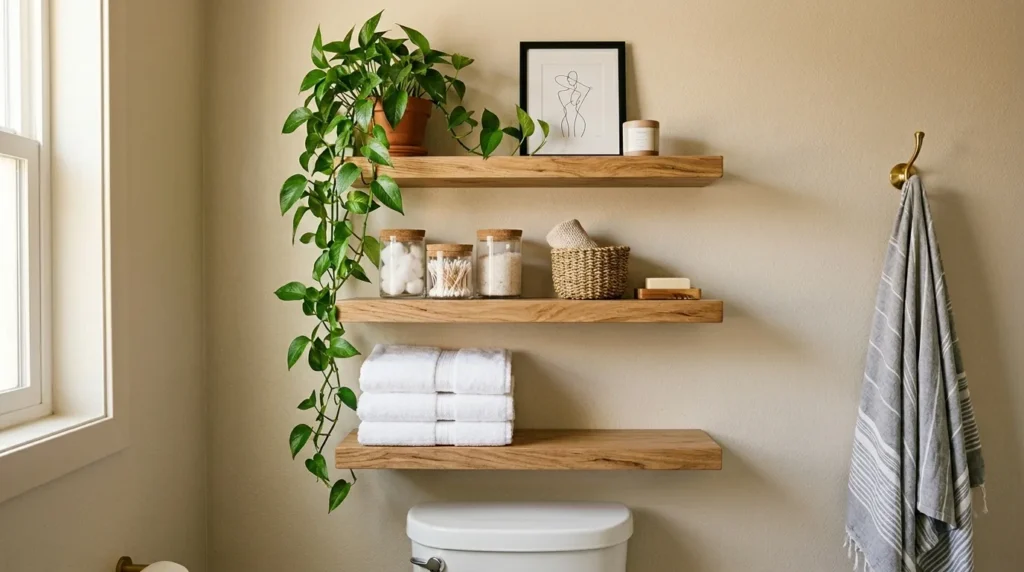
Shelf storage is a practical way to make empty wall space work harder without crowding the room. This tip works especially well above toilets, beside mirrors, or near tubs where there is unused vertical space. Use sealed wood shelves, metal brackets, floating ledges, or painted boards that match the bathroom style. Install shelves securely with proper anchors, especially if they will hold towels or jars. Keep the depth shallow enough so people can move comfortably without bumping into the shelves.
The visual upgrade comes from styling the shelves with both function and beauty in mind. Fold towels neatly, use clear jars for cotton rounds, add a woven basket for extras, and include one small plant or framed print for softness. Avoid filling every inch, because crowded shelves can make a bathroom feel smaller. That’s why many organizers recommend leaving open space between objects. When shelf colors, baskets, and towels repeat the room’s palette, the storage looks decorative instead of like a last-minute solution.
7. Shower Refresh
- Makes the bathing area feel cleaner, brighter, and more spa-inspired.
- Works with a new curtain, liner, showerhead, caddy, bottles, or grout pen.
- Helps older tubs and tile look fresher without demolition.
- Adds function by improving storage, water flow, and daily comfort.
- Creates one of the most noticeable changes in the room.
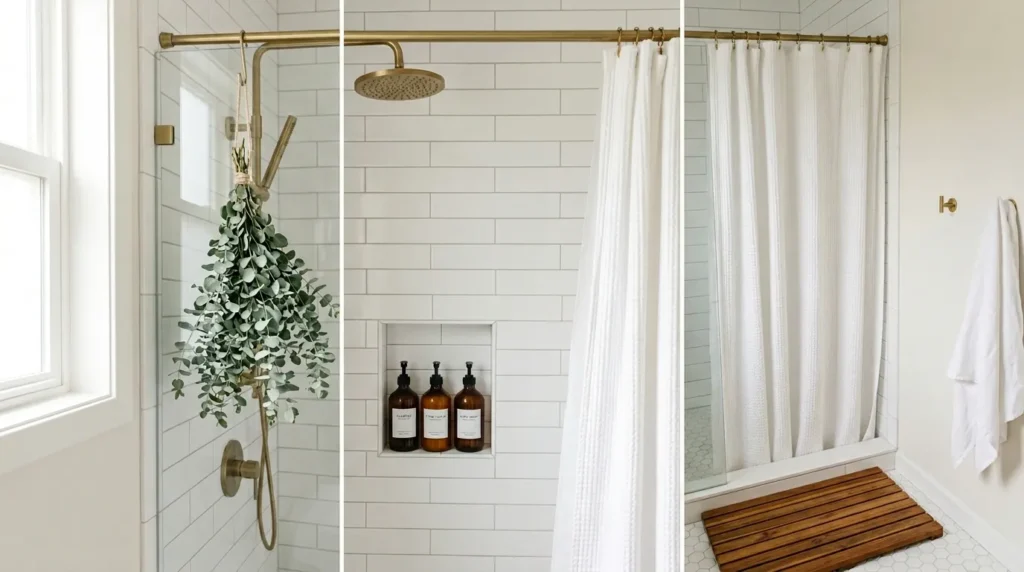
A shower refresh can make the whole bathroom feel cleaner because the shower area takes up so much visual space. This tip works even if you are not replacing tile. Start with a fresh liner, a better shower curtain, and a simple storage system that keeps bottles off the tub edge. A rainfall showerhead, handheld sprayer, or clean metal caddy can improve the daily routine quickly. Use a grout pen or deep cleaner if the tile lines look tired but are still structurally sound.
The transformation feels especially strong when the shower looks edited and intentional. Matching refillable bottles, a small soap tray, and one eucalyptus bundle can create a spa feeling without expensive remodeling. A white waffle curtain feels hotel-inspired, while a linen-look curtain softens hard tile. In my experience, the key is removing product clutter before adding decor. Keep only daily items in the shower and store backups elsewhere. When the shower zone feels fresh, the entire bathroom feels more cared for and relaxing.
8. Hardware Swap
- Updates cabinets, towel bars, hooks, toilet paper holders, and shelves quickly.
- Helps mismatched details feel more coordinated.
- Works with brass, black, chrome, bronze, nickel, or mixed metals.
- Adds polish without replacing major fixtures.
- Makes budget updates look more professional and connected.
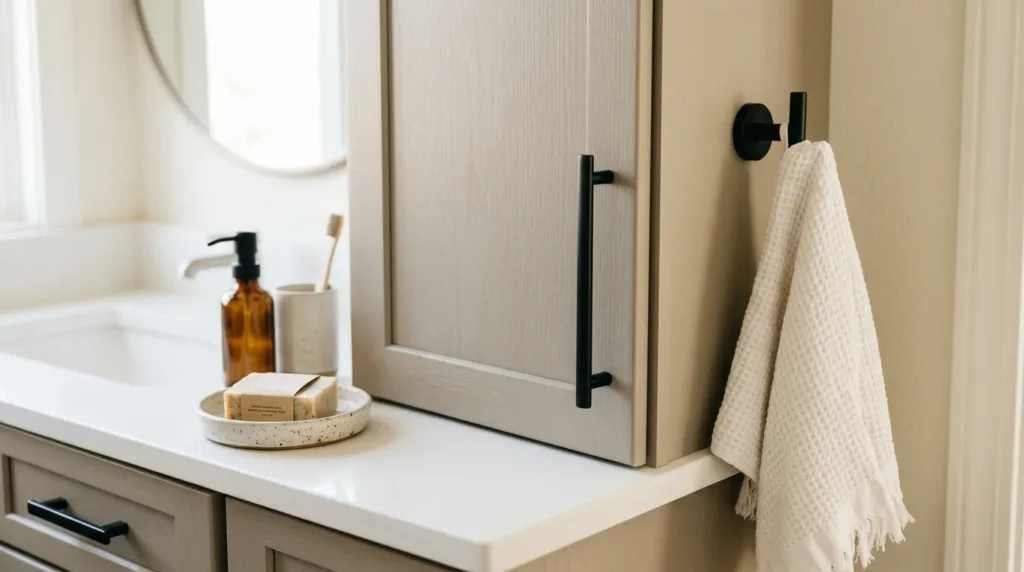
A hardware swap is small, but it can make a bathroom feel noticeably more finished. This tip works because handles, hooks, towel rings, and holders are visible details that shape the room’s style. Replace outdated cabinet knobs with pulls that fit the existing screw spacing, then coordinate towel hooks, toilet paper holders, and shelf brackets. Brass feels warm, matte black feels modern, chrome feels classic, and brushed nickel blends easily. The goal is not perfection, but repetition that feels deliberate.
The finished look becomes calmer because the eye sees a plan instead of random metal finishes. If your faucet is chrome and your mirror is black, repeat each finish at least twice so the mix looks intentional. That’s why many designers recommend coordinating small details before spending on large pieces. In shared or family bathrooms, sturdy hooks are often more useful than towel bars because they are easier for everyone to use. A simple hardware update can make older cabinetry and walls feel much newer.
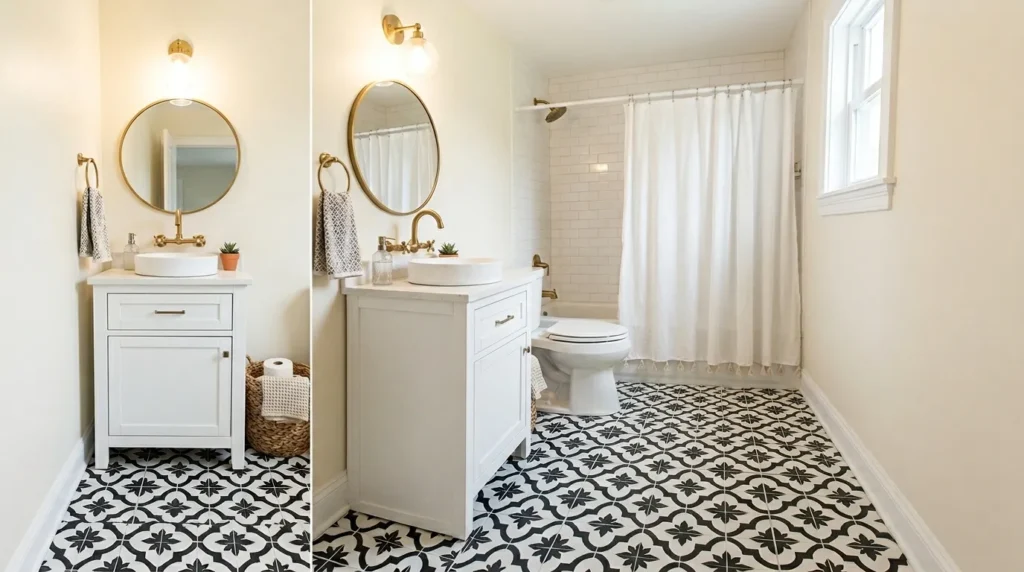
9. Floor Update
- Refreshes dated flooring without a full tile replacement.
- Works with peel-and-stick tile, painted floors, washable rugs, or grout refresh.
- Adds pattern, color, or cleaner contrast to the room.
- Helps the entire space feel newer from the ground up.
- Requires careful cleaning, measuring, and moisture-conscious material choices.
A floor update can make a dated bathroom feel transformed because flooring covers such a strong visual area. This tip works well when the existing surface is unattractive but still stable. Peel-and-stick tiles can create a checkerboard, stone-look, terrazzo, or marble effect, while floor paint can refresh older tile or vinyl with proper prep. Clean the floor thoroughly, repair loose spots, and follow product instructions closely. In wet rooms, choose materials rated for moisture and seal edges where needed.
The result feels dramatic because a fresh floor changes the room from the bottom up. A black-and-white pattern adds vintage charm, warm stone tones feel organic, and a soft neutral rug can hide dull flooring in a renter-friendly way. I’ve noticed patterned floors look best when the rest of the room stays calmer. Keep towels simple, hardware consistent, and counter styling minimal. A thoughtful floor update can make an older vanity or basic shower look more intentional because the room finally has a strong foundation.
10. Textile Reset

- Refreshes the bathroom quickly with towels, curtains, rugs, and mats.
- Adds softness to tile, glass, porcelain, and metal finishes.
- Helps introduce color, pattern, and texture without permanent changes.
- Works well for renters and seasonal updates.
- Makes the room feel cleaner and more comfortable instantly.
A textile reset is one of the easiest ways to make a bathroom feel new without using tools. This tip works because towels, bath mats, and shower curtains take up more visual space than people realize. Replace mismatched towels with a coordinated set, choose a washable rug or textured bath mat, and upgrade the shower curtain if it looks thin or tired. White waffle towels feel spa-like, sage feels fresh, charcoal adds contrast, and warm beige creates a soft neutral mood.
The transformation is quick, affordable, and very practical for everyday living. Textiles can make hard surfaces feel warmer, soften echo, and bring color into a plain room. That’s why many stylists treat towels and curtains as the finishing layer of a makeover. Choose fabrics that match your routine, not just the photo. Quick-dry towels are better for humid or windowless bathrooms, while thicker towels feel luxurious in well-ventilated spaces. A smart textile reset makes the entire bathroom feel fresher, softer, and more cohesive.
11. Final Styling
- Pulls together paint, storage, lighting, hardware, and textiles.
- Works with trays, plants, candles, art, baskets, jars, and small decor.
- Helps the bathroom feel finished instead of simply updated.
- Keeps daily essentials organized and visually calm.
- Adds personality while still protecting counter and shelf space.
Final styling is what turns a project from improved to complete. This tip works because even useful updates can feel unfinished without a few thoughtful details. Add a tray to group soap and lotion, place a small plant near natural light, use a framed print on an empty wall, or add a woven basket for extra towels. Keep decor moisture-friendly and easy to clean. The goal is not to fill every surface, but to create a bathroom that feels warm and cared for.
The final result should feel personal, practical, and easy to maintain. A successful Bathroom Makeover is not just about trends; it is about making the room support your daily routine with less clutter and more comfort. In my experience, styling works best after everything unnecessary has been removed. Choose two or three accents that repeat the room’s palette, such as wood, brass, white towels, or greenery. When the details are edited, the space photographs beautifully and still feels comfortable for real life.