
")
1) Sea Glass Ombre

Sea-glass ombré nails look like you dipped your fingertips into a calm lagoon. Blend mint, aqua, and misty blue so the color stays soft and airy, like worn glass found on the shore. This design feels clean, minimal, and expensive without being loud. In vacation photos, it pairs beautifully with white linen, denim shorts, and ocean backdrops because it doesn’t fight with your outfits. The translucent effect also makes hands look fresh and bright in close-ups.
For a photo-ready finish, choose a sheer base, sponge on two to three shades, and seal with a high-gloss top coat. Add one thin pearl or tiny shimmer layer if you want “sunlight on water” vibes. Checklist: almond or oval shape, pastel palette, glossy top coat, and a simple ring stack. Photo tip: hold a seashell or sunglasses at golden hour so the gradient catches light and looks extra dreamy.
2) Sunset Gradient Tips

Sunset gradient tips bring instant vacation energy, like the sky right before dusk. Keep the base nude or milky, then fade peach into coral and a touch of magenta near the edges. It’s bold enough to feel fun, but still wearable for dinners, pool days, and travel outfits. In photos, the warm colors make your skin look sun-kissed and vibrant. This style also matches beach makeup looks and pops beautifully against blue water backgrounds.
To make it last, use a thin nude builder base, blend colors with a sponge, and finish with a thick glossy top coat for “glass” shine. Checklist: short-to-medium length, neutral base, warm gradient, and a clean cuticle line. Photo tip: pose with a tropical drink or sunset sky behind you—warm tones in the background will amplify the gradient and make the nails look even more luminous.
3) Minimal Palm Leaf Accent
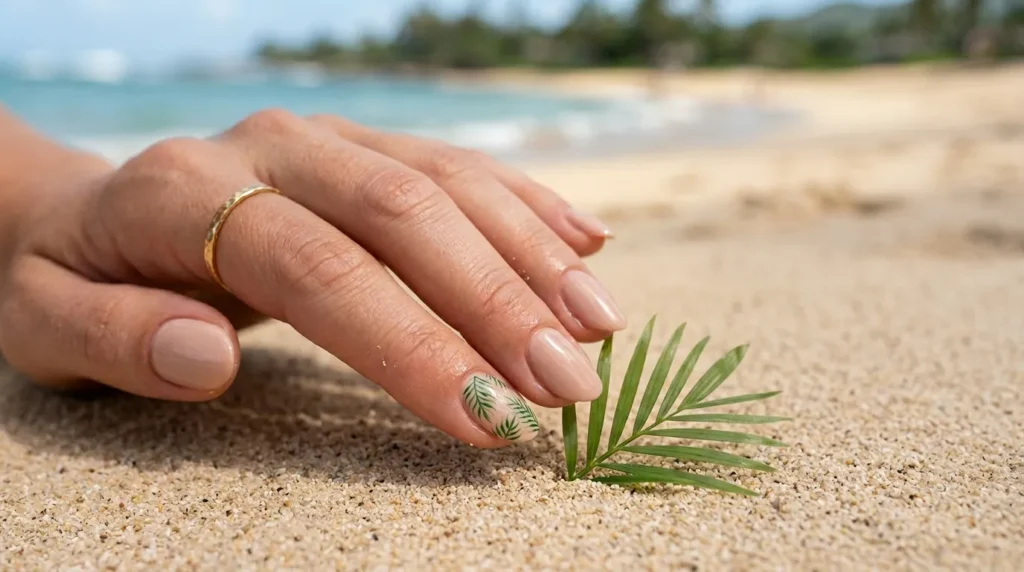
If you want beach vibes without going full tropical, minimal palm leaf accents are perfect. Use a nude, blush, or sheer beige base and add a thin palm frond drawing on one or two nails. The design feels chic, clean, and easy to match with every outfit in your suitcase. It photographs well because the negative space keeps hands looking neat and elongated. This is also great for short nails and low-maintenance travelers who still want a “vacation detail.”
Keep the lines crisp with a fine brush or nail art pen, then seal with a glossy top coat so it looks salon-sharp in photos. Checklist: neutral base, one accent nail, deep green or white line art, and tidy cuticles. Photo tip: hold a straw hat or beach bag handle—simple props highlight the tiny leaf detail and make the nail art feel intentional, not busy.
4) Coral + Gold Foil Pops

Coral nails scream summer, and gold foil makes them look instantly luxe. Pick a bright coral that complements your skin tone, then press tiny gold foil flakes onto one or two nails for a sunkissed sparkle. This design looks amazing with tan lines, gold hoops, and beachy dresses. In vacation photos, coral stands out without clashing, and the foil catches sunlight like little reflections off the sea. It’s playful, polished, and easy to wear from daytime exploring to dinner.
For the cleanest look, apply foil on slightly tacky polish or foil glue, then top coat generously to smooth edges. Checklist: coral polish, gold foil accents, glossy finish, and gold rings to match. Photo tip: shoot in direct sunlight for a few frames—foil reflects bright highlights and makes the manicure look expensive and editorial, even on a phone camera.
5) Mermaid Scale Shimmer

Mermaid scale nails are made for beach trips—iridescent, magical, and totally photo-friendly. Use a teal or aqua base and layer a scale stencil or stamped pattern with pearl, lavender, or holographic shimmer. The shifting colors look different in every light, which makes your vacation photo set feel extra fun. This design pairs beautifully with swimsuits, coverups, and beach jewelry. If you love bold nails but still want a cohesive look, mermaid scales are the perfect theme.
To avoid a chunky finish, use thin shimmer layers and finish with a plumping top coat for a smooth, glossy surface. Checklist: ocean-tone base, scale pattern, iridescent topper, and at least one accent nail for balance. Photo tip: take a shot with your hand near water or a reflective pool—movement and sparkle will emphasize the color shift and make the scales look alive.
6) White Wave French Tips
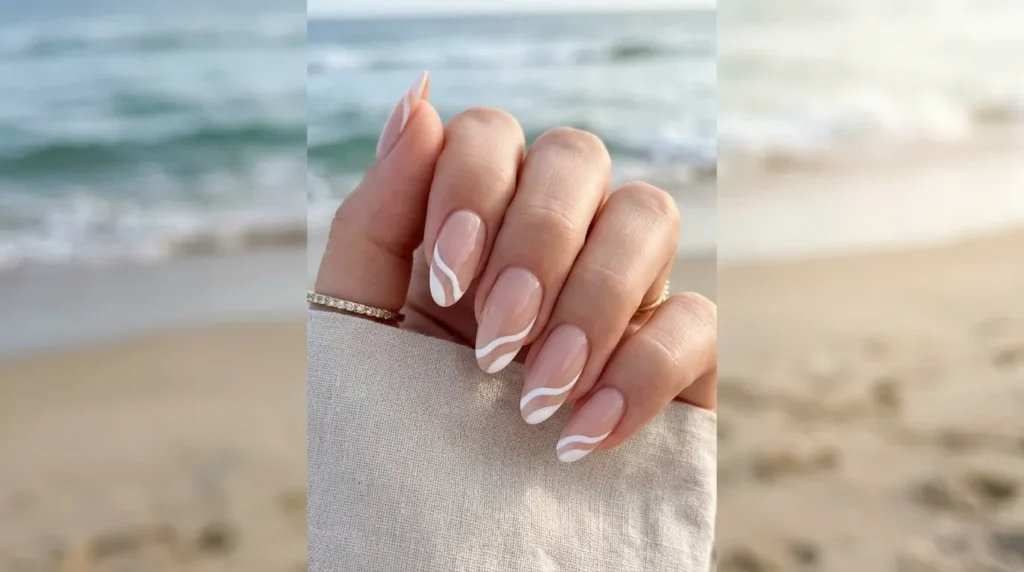
White wave French tips are the beachy version of a classic manicure. Instead of a straight line, the tip curves like a gentle wave, giving you an effortless coastal vibe. The nude base keeps it clean and flattering, while the white detail looks crisp in every photo. This is perfect if you want nails that match every outfit, from bikinis to dinner dresses. In close-up shots, the wavy line adds interest without looking busy or trendy in a way that dates quickly.
Use a thin brush to draw a flowing tip, or try nail tape guides if you’re DIY-ing. Checklist: nude base, bright white wave, glossy top coat, and medium-short length for comfort. Photo tip: pose with a book, sunglasses, or a shell—the simple wave detail shows best when your hand is slightly angled and the tips catch the light.
7) Tropical Fruit Mix (Watermelon + Citrus)

Tropical fruit nails are fun, cheerful, and perfect for vacation photo dumps. Mix mini watermelon slices, lemon wedges, or tiny orange segments on a milky base so the design stays cute, not chaotic. The bright colors pop against beach scenery and make your hands look lively in selfies. This style fits pool parties, resort stays, and summer birthdays, and it looks amazing holding a cold drink or beach snack. If your outfits are mostly neutral, fruit nails become your statement accessory.
For a cleaner look, keep most nails simple and place fruit art on two or three accent nails. Checklist: milky base, bright fruit accents, tiny detail brush, and glossy top coat. Photo tip: hold a real fruit cup or colorful drink—matching props makes the nail art feel intentional and super “Pinterest,” especially in bright daylight.
8) Pink Sand Glitter Fade
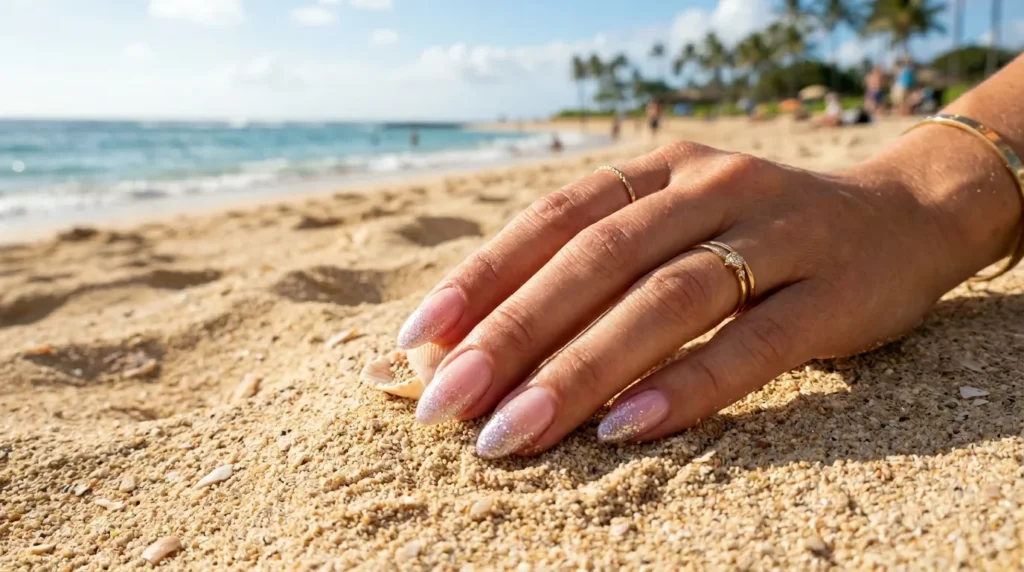
Pink sand glitter fade nails look romantic and beachy at the same time. Start with a soft blush or baby pink base, then fade fine champagne or rose glitter from the tips downward. It’s subtle enough for everyday wear but still catches sunlight beautifully in photos. This design works for beach vacations, honeymoons, and weekend getaways when you want a little sparkle without full glitter nails. It also looks great with white outfits and gold accessories, making your photos feel airy and polished.
To keep it smooth, use micro-glitter and build the fade in thin layers, then seal with a thick top coat. Checklist: blush base, fine glitter gradient, glossy finish, and neat cuticles. Photo tip: shoot while holding your phone or sunglasses—glitter looks best when your hands are in motion and the light creates tiny sparkles on the tips.
9) Nautical Stripes + Tiny Anchor
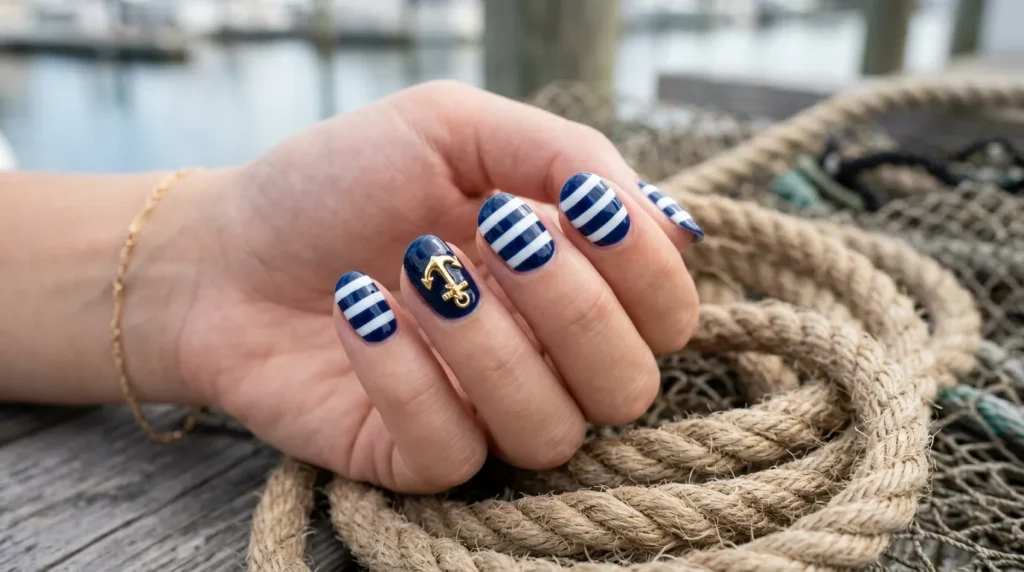
Nautical stripes are timeless beach style—think sailboats, seaside towns, and striped towels. Use crisp navy and white lines on a few nails, then keep the rest nude or solid navy for balance. Add a tiny anchor decal or gold stud on one accent nail for a cute finishing touch. This design looks amazing with denim, white tops, and classic vacation outfits. In photos, the bold stripes show clearly even from a distance, so your manicure still stands out.
For clean lines, use striping tape or a thin liner brush and let each layer dry before the next. Checklist: navy/white palette, sharp stripes, one anchor detail, and glossy top coat. Photo tip: pose with a beach bag strap or a striped towel—repeating patterns in the scene makes the nails look styled and intentional in your vacation shots.
10) Seashell Accent Nail
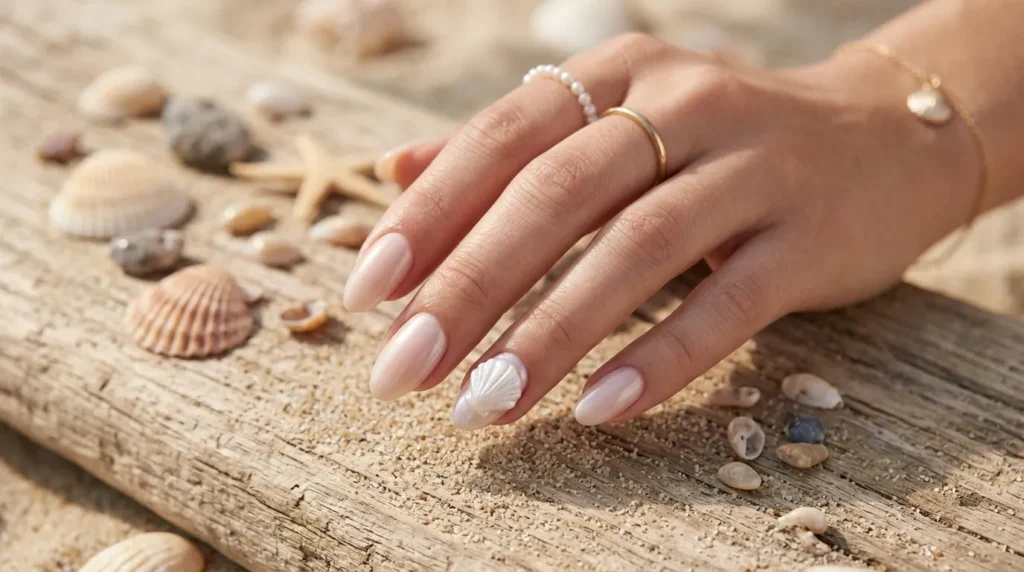
A seashell accent nail is the ultimate beach souvenir—cute, coastal, and photo-ready. Keep most nails a milky nude, pearl white, or soft pink so the look stays elegant, then add one shell detail on the ring finger. The shell can be 3D gel sculpted, a decal, or a stamped design with pearly shimmer. In vacation photos, this looks stunning holding shells, sand, or jewelry. It gives “beach bride” energy without being too formal, and it works for short or long nails.
To keep it wearable, choose a low-profile shell or place it on one nail only. Checklist: milky base, pearl shimmer, one shell accent, and smooth glossy top coat. Photo tip: take a close-up with real shells in your palm—matching the prop to the nail art makes the design feel cohesive, like it belongs in the scene.
11) Turquoise Marble Swirls

Turquoise marble nails look like tropical water captured on your fingertips. Swirl turquoise, white, and a tiny hint of gold or silver to mimic ocean ripples. This design feels fresh and energizing, especially for beach vacations and poolside photos. It pairs well with white swimsuits, tan skin, and bright resort outfits. In close-up shots, marble patterns create movement and depth, making your nails look detailed without needing tiny drawings. If you want something bold but still classy, turquoise marble is a perfect pick.
Use a blooming gel or water-marble technique for soft blends, then seal with a glossy top coat to enhance the “wet” look. Checklist: turquoise + white palette, marbled swirls, metallic hint, and medium length for best pattern space. Photo tip: shoot near water or a blue wall—matching backgrounds make the turquoise look even richer and more tropical.
12) Hibiscus Flower Pop
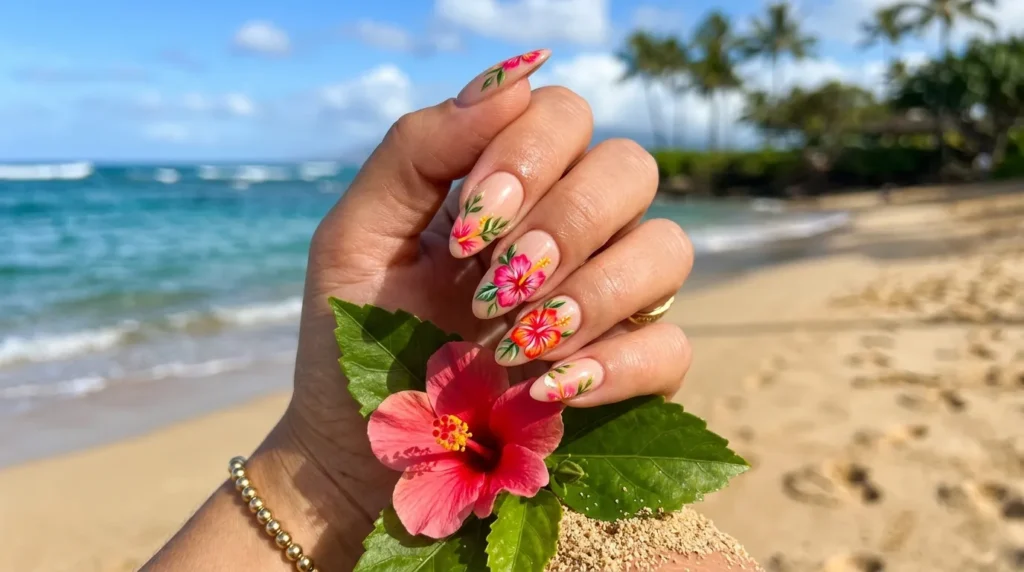
Hibiscus nail art instantly says “tropical vacation.” Use a nude or soft pink base, then paint one bold hibiscus bloom on an accent nail, or add tiny petals across two nails for a balanced look. The flower photographs beautifully because it’s recognizable and cheerful, even in quick snapshots. This design pairs perfectly with floral dresses, beach coverups, and colorful swimsuits. If you’re traveling somewhere warm, hibiscus nails feel like a fun detail that matches the whole vibe of the trip.
Keep the petals clean and vibrant with a detail brush, and outline lightly so the flower stays crisp on camera. Checklist: neutral base, one bright flower, small green leaf accents, glossy top coat. Photo tip: pose with a real flower tucked behind your ear or held in hand—matching the manicure to real blooms makes your photos feel styled and extra Pinterest-worthy.
13) Starfish + Sand Speckle

Starfish nails are cute, beachy, and surprisingly wearable when you keep the palette natural. Use a sandy beige base with subtle speckles to mimic real sand, then add a tiny starfish decal or hand-painted star on one accent nail. This design feels calm and coastal, perfect for travelers who prefer neutral tones over neon. In vacation photos, it blends beautifully with beach backgrounds while still looking intentional. It also pairs well with gold jewelry and natural makeup looks for a soft, effortless aesthetic.
Try a matte top coat for a real “sand” vibe, or go glossy if you want more shine. Checklist: beige base, light speckles, one starfish accent, and tidy cuticles. Photo tip: take a close-up with your hand resting in sand—textures will match, making the nail design look like it’s part of the scenery, not just an add-on.
14) Lemonade Yellow Micro-French

Lemonade yellow micro-French tips are fresh, bright, and perfect for summer photos. Keep the tips super thin so the look stays chic and minimal, then let the yellow add that sunny vacation vibe. This design works with every outfit because the base is neutral, but it still looks fun and different in close-ups. Yellow also stands out nicely against beach blues and white clothing, making your nails visible even in casual snapshots. It’s a great option if you want color without committing to full bright nails.
For the cleanest line, use a fine brush or curved guide stickers. Checklist: milky nude base, thin yellow tip, high-gloss top coat, and short-to-medium length. Photo tip: hold a lemon drink or wear a yellow accessory—small color repetition makes your manicure look styled, especially in bright sun where yellow looks extra vibrant.
15) Coral Reef Confetti Dots
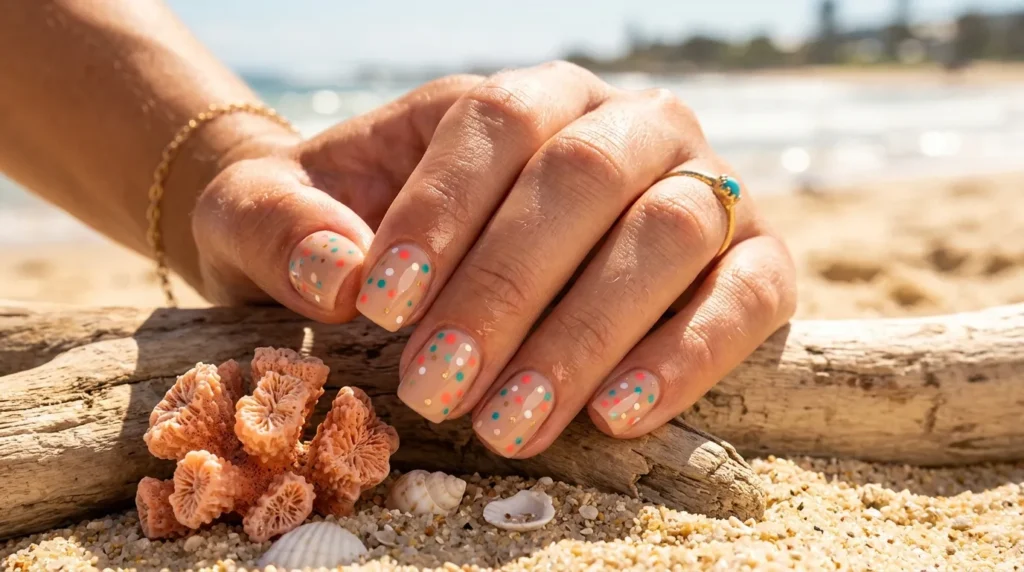
Coral reef confetti nails are playful without being complicated. Start with a nude or milky base, then add scattered dots in coral, teal, and white to mimic tiny reef colors. The dot pattern looks cute in photos because it reads clearly even if your hand isn’t super close to the camera. This design also hides minor chips better than solid polish, making it travel-friendly. If you like fun nails but don’t want detailed drawings, confetti dots give you that cheerful beach energy in a simple way.
Use a dotting tool or bobby pin tip for easy, even dots, then seal with glossy top coat. Checklist: nude base, 2–3 bright dot colors, random spacing, and smooth shine. Photo tip: snap a shot holding sunglasses or a beach snack—busy props plus confetti nails create a fun, summery composition that feels candid and styled.
16) Ocean Blue Chrome

Ocean blue chrome nails look like reflective water at night—bold, sleek, and incredibly photo-friendly. The metallic sheen catches every light source, so your nails pop in selfies, golden-hour shots, and indoor dinner photos. Choose a deep blue chrome for a dramatic beach vibe, or a lighter aqua chrome for a brighter tropical feel. This style pairs beautifully with silver jewelry and minimal outfits, letting the nails be the statement. If you want a manicure that looks “done” from every angle, chrome always delivers.
To keep chrome smooth, apply powder over a no-wipe top coat and seal with another glossy layer. Checklist: blue base, chrome powder, high-gloss top coat, and clean edges around cuticles. Photo tip: take a short video clip while moving your hand—chrome shifts and reflects, making the nails look extra luxurious and dynamic in vacation content.
17) Pastel Rainbow Tips
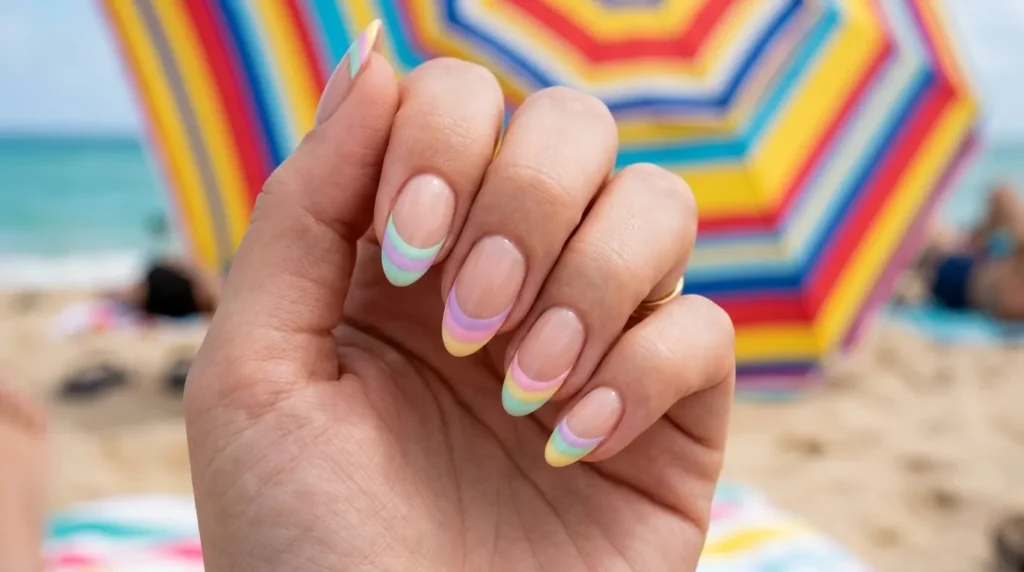
Pastel rainbow tips feel like summer candy—soft, cute, and perfect for beach photos. Keep the base nude or milky and paint each tip a different pastel shade, or blend two pastels per nail for a gentle gradient. The look is colorful but not neon, so it stays wearable for everyday travel outfits. In photos, pastel tips stand out against beach scenery without stealing attention from your face or clothes. It’s a cheerful choice for group trips, festivals, and playful vacation moments.
For a cleaner finish, use a thin brush and keep all tips the same width. Checklist: nude base, 4–5 pastel shades, consistent tip shape, glossy top coat. Photo tip: pose holding a beach umbrella handle or colorful towel—pastels look even cuter when your background has soft color, creating an airy, dreamy Pinterest vibe.
18) Beach Towel Pattern Blocks
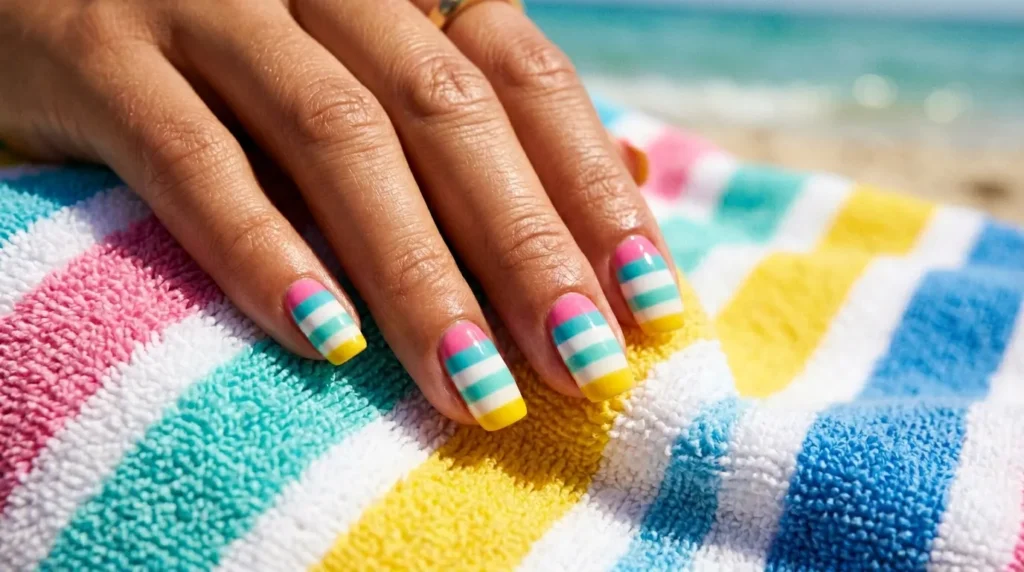
Beach towel pattern nails are fun, graphic, and instantly summery. Use block stripes in pink, aqua, white, and sunny yellow to mimic classic towel designs. This manicure looks great in photos because the pattern is bold and readable, even when your hand is farther from the camera. It’s also a cute match for poolside outfits and beach accessories. If you love bright colors and playful designs, towel stripes feel like wearing vacation energy right on your fingertips.
To avoid messiness, paint stripes with tape or a thin liner brush, and keep spacing consistent. Checklist: 3–4 bright colors, clean stripe edges, one accent nail if needed, glossy top coat. Photo tip: photograph your nails on an actual towel—pattern-on-pattern looks intentional and editorial, especially in bright daylight.
19) Pineapple Negative Space

Pineapple negative space nails are cute, tropical, and surprisingly chic. Keep most of the nail clear or nude, then add small pineapple outlines or tiny fruit icons on one or two nails. The negative space makes the design feel light and modern, perfect for hot weather and travel. In vacation photos, the tiny pineapples add personality without looking busy. This style pairs perfectly with bright swimwear, straw hats, and tropical drinks, making it ideal for resort trips or beach weekends.
Use thin lines and minimal color—gold outlines with a small green crown look especially clean. Checklist: clear or nude base, tiny pineapple accents, glossy top coat, and short-to-medium length. Photo tip: hold a pineapple smoothie or piña colada—matching props make the nail art feel themed and super Pinterest-friendly.
20) Coconut Milk Glaze (Milky White Gloss)

Coconut milk glaze nails are the ultimate clean beach manicure. Think milky white with a glossy, slightly translucent finish that looks fresh and expensive. This style makes hands look brighter and more polished in every vacation photo, especially close-ups holding drinks, sunglasses, or your phone. It matches everything, from colorful swimsuits to neutral linen outfits, and it never looks “too much.” If you want a low-stress travel manicure that still looks luxe, this glazed milky white is one of the best choices.
For extra glow, add a subtle pearl chrome topper and seal with a thick glossy top coat. Checklist: milky white base, smooth glaze effect, high shine, and clean cuticle prep. Photo tip: shoot against a blue ocean or pool background—the contrast makes the milky nails look even cleaner and more high-end.
21) Sand Dune Matte Neutrals
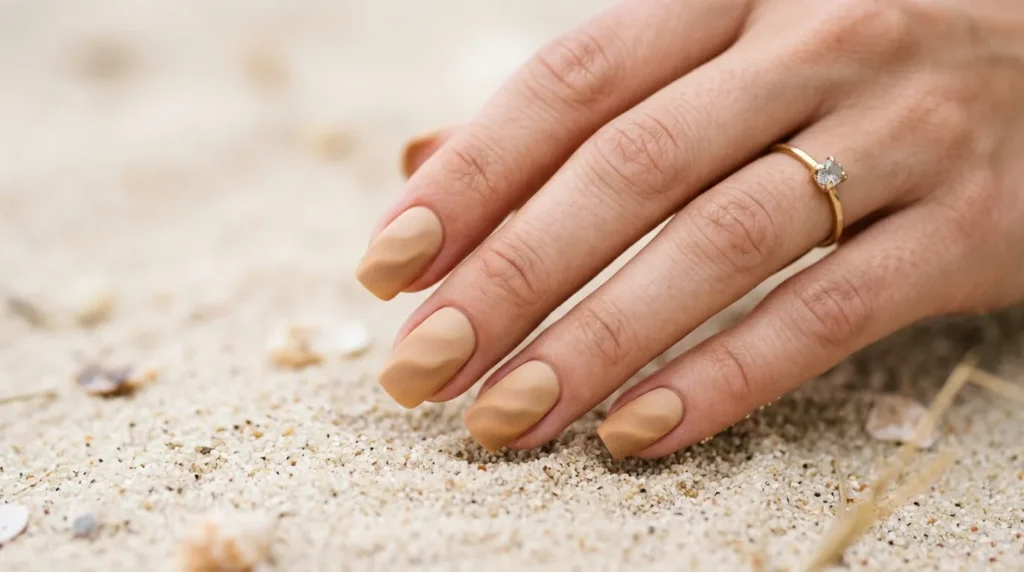
Sand dune matte nails are for the neutral lovers who still want a beach theme. Use warm beige, tan, and caramel tones in a soft gradient so each nail feels like a slightly different shade of sand. The matte finish makes the look modern and editorial, and it photographs beautifully because it reduces glare. This manicure pairs perfectly with gold jewelry, minimal outfits, and natural makeup. It’s also great for long travel days because neutral tones are forgiving and still look polished even if you’re constantly on the go.
Blend two warm shades per nail for a dune-like fade, then top with matte coat. Checklist: warm neutrals, soft gradient, matte finish, and short-to-medium length for practicality. Photo tip: take a flat-lay shot with your hand on sand or a woven bag—matte textures look stunning with natural materials.
22) Blue Lagoon Glitter Cuticle Fade

Blue lagoon glitter cuticle fade flips the usual glitter gradient in the coolest way. Start with a nude or milky base, then pack aqua and blue micro-glitter near the cuticles, fading it softly toward the center of the nail. It feels like shimmering water pooling at the base—super beachy and unique. In photos, the glitter near your cuticles draws attention to rings and hand poses, making your manicure look intentional and styled. It’s a great choice if you want sparkle but still want the tips to stay clean and minimal.
Use fine glitter for a smooth finish and seal with a glossy top coat to lock everything in. Checklist: nude base, aqua/blue micro-glitter, soft fade, and glossy shine. Photo tip: pose with your hand near a pool edge—water reflections plus glitter create a bright, dreamy look that screams vacation.
23) “Vacation Postcard” Doodles
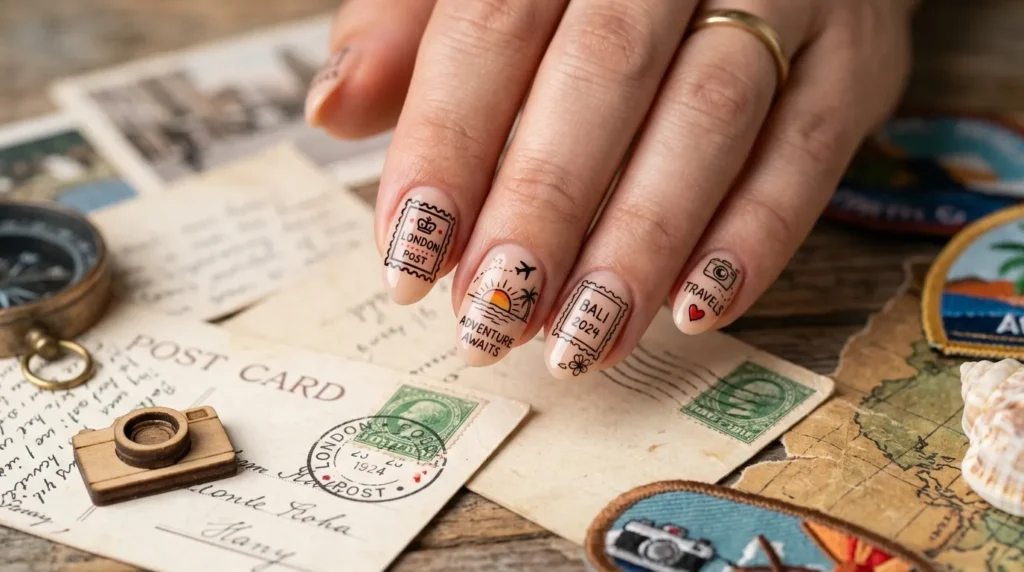
Vacation postcard doodle nails are adorable for photo dumps and travel reels. Keep a nude base, then add tiny icons like a sun, wave, palm tree, and little “stamp” outlines on different nails. The look feels personal, like a mini travel journal on your fingertips. In photos, the doodles give viewers something fun to notice, especially in close-ups holding maps, tickets, or a passport. This design works best if you like playful details and want nails that match the whole “travel story” vibe.
Keep doodles minimal and spaced out so they don’t look cluttered, then finish with a glossy top coat. Checklist: nude base, 2–3 doodle icons, clean black lines, one pop color accent. Photo tip: take a shot with postcards or a passport—matching the theme makes the manicure look curated and perfect for Pinterest saves.